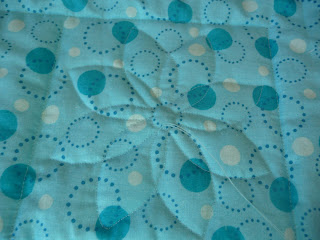
I love the dark chocolate-brown border and the bright orange binding! I'm just not a pastel person. This is the first quilt that I've assembled without pre-washing the fabric. I like the way washing and drying kind of hide most of the, uh, imperfect stitching. And the parts that aren't hidden? Well, that's how you know that it's hand made! So, here's how it was finished...
How to Quilt?
 |
| Ditch stitching (quilt back) |
I couldn't find exactly the flower that I wanted in my software or on my bookshelf, so I adapted the one I liked the best, adding a circle in the center of overlapping petals. Since the motif has simple curves and stopping/turning points, I thought it was a good candidate to again attempt free-motion stitching. The practice squares went pretty well, but when I started in the middle of the Real Quilt, it didn't look so hot. But I really wanted the flowers! I figured I could tackle this with my walking foot -- after stitching 1 or 2 stitches at a time on that map-of-the-U.S. quilt, this should definitely be doable.
Marking the Quilt
Having decided on the motif and the walking foot, I next had to figure out how to get the motif onto the quilt. I tried making my own stencil and marking the quilt with a marking pencil, but (a) making the stencil was a pain and (b) I couldn't see the lines anyway, even if I marked the back instead of the top. Same with chalk.
 |
| Stitching over the motif with my walking foot. |
Quilting the Blocks
 |
| The paper is so smooth; quilting gloves make the job easier, even though not doing free-motion. |
 |
| Removing the quilting paper -- ta da! |
 |
| The flower motif on the quilt back. |
More Lessons Learned
If the "rule" applies, follow it. If it doesn't, do what works.
When I first started sewing the flowers in the blocks, I started in the center of the quilt -- that's what "they" say to do. But I had trouble turning the quilt without tearing the paper. Then, DUH! Since I'd already stitched around all the blocks, I could start the flower quilting wherever I wanted to without much worrying about things shifting. So, as you can see in the photos above, I started in a corner. Of course, then I ended up having to shove the entire quilt under the machine arm at some point. But the actual sewing was much easier, a real confidence-builder. After quilting around the edges, I'd gained experience working with the paper and the center went much more smoothly.
Just shove it.
There are all kinds of things you can buy to help you roll, fold or pleat the part of the quilt that's not being quilted. I found that it's easier for me to just shove the rest of the quilt to the back, at least for a crib-sized or lap quilt. Interestingly, I just found a video on the web where the expert quilter says to do the same thing. Hooray for the web! You can always find someone who says what you want them to say!
A tool discovered
When I signed up for something, I forget what, they sent a free gift, That Purple Thang. It's a little plastic doohicky that looked to me to be totally unnecessary (no wonder it was free!). After all, I keep 3 chopsticks at hand at all times -- Chinese, Japanese and Korean. You can poke anything with those puppies. Well, it turns out that That Purple Thang is actually pretty cool. One end is slightly curved (unlike a chopstick!), so you can get it under things to lift them up. And unlike a seam ripper you don't risk damaging the fabric in the process. It's wonderful for pulling your bobbin thread to the top of the quilt. I used it lift up the paper patterns after quilting; it's great for scratching off the tiny pieces that didn't tear cleanly. It has a little 1/4" square at the other end for quick accuracy assessment. It's available in many stores and websites. It's not expensive, but the price varies quite a bit, so shop around.
Quick Note:
A couple of people have mentioned that some of the photos in my earlier posts were hard to see. I've now gone back and enlarged some of them, so you might want to re-visit the posts and let me know if this is an improvement.


No comments:
Post a Comment