Wednesday, June 26, 2019

Quilt Show Inspiration

A couple of weeks ago, the Eastern Long Island Quilt Guild held its annual show in Riverhead, NY.  It is a big event, and guild members put in a ton of work to make it successful.  So many wonderful quilts, and as a docent, I had a chance to walk through and listen to quilters I didn't know talk about their creative process.  These are some of the highlights.

This beauty was a Best in Show.  It wasn't my favorite in terms of composition, but the colors and technique were awesome.


I've seen this technique in quilting magazines, but in person it was more than awesome.  The photo doesn't do it justice.  The tulle was nearly invisible, but pulled the entire scene together.


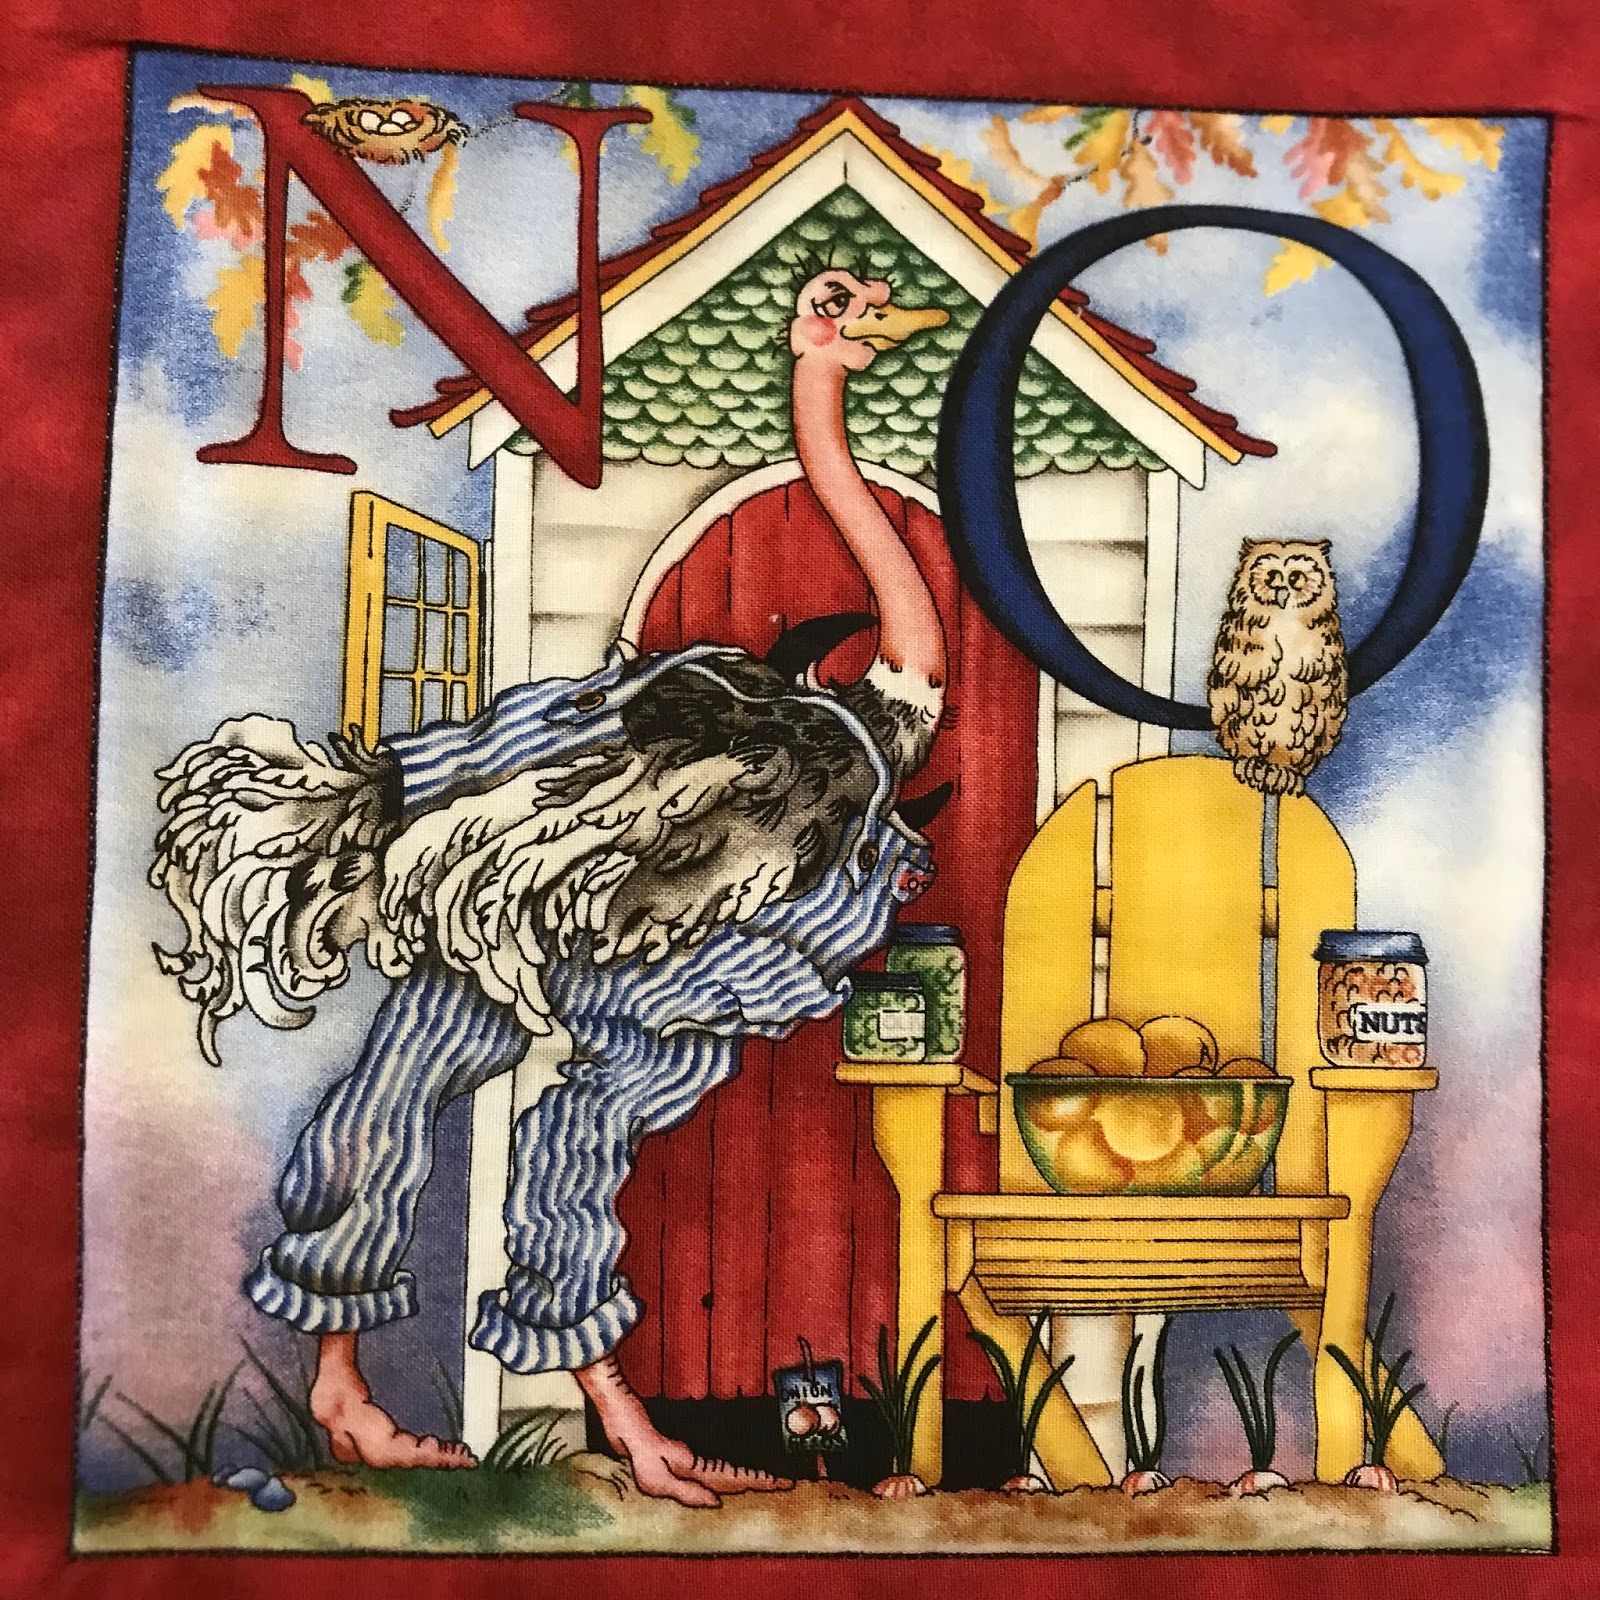
This isn't so much a quilt as a piece of fiber art.  I apologize that I neglected to photograph the information about the artist.  The photo doesn't adequately capture the 3-dimensional quality of the strands of hair and the flowers on the hat.  The quilt is about 4 ft. tall.


The artist hand-painted the face.


This quilt was made by my friend, Deb, who is part of our Thursday-morning quilt group.  She won several ribbons for it, which she made with Kaffe Fasset fabrics for her brother, who is constantly going in many directions, as is this quilt!


She fussy-cut the cabbage blocks and quilted them around the leaves.


She strip--pieced the alternating blocks and sashed everything with a black-and-white print.


My friend Carol, also in our Thursday morning group, got lots of oohs and aahs when her llama quilt was previewed at the guild before the show.  The quilt was from a kit, but she added her own touches.


One of the ribbons was for her quilting, which enhanced without dominating the quilt.  Lovely.


One of my favorite quilts in the show was an embroidered sampler.  The quilter started it as a block-of-the month project, but then enhanced it was some wonderful 3-dimensional touches. I am in awe.


Here's another project that went way beyond the original concept to become an award-winning, awesome quilt.


The center of the quilt is a town at night.  As you move out from the center, you move out through time (night to day) and through the landscape -- from city to suburbs to the countryside.  Each small block is unique.  I love this!


Another from my friend, Deb. She got most of these batik fabrics during a trip to Thailand.  Each lantern is unique, each linked together by a small chain of three machine-embroidery stitches.


She used a long-arm to quilt narrow matchstick lines horizontally rhtough the neutral background, purposefully allowing the lines to "wobble" to indicate movement, perhaps because of a gentle wind.


And another from Carol -- so different from the llamas!  she made this for her son who is a big Batman fan. The general design is a riff on Van Gogh's Starry Night, with the dark city in the lower right corner and Batman surveying the scene.  Everyting is individually pieced.  What a thrill to see this quilt created from beginning to end. 


Every one of us makes our quilts for different reasons, many as a gift of love to someone else.  This Tree of Life quilt was made as a remembrence to honor those who lost their lives at the Tree of Life Synacogoge in Pittsburgh just months before the quilt show.  The artist's words tell it all.


Quilting is so inspirational, for us, the quilters, and also for the craft that we do and the art that we make.  I am so happy to be part of this community.


Sunday, June 16, 2019

Anybody Having Fun?

How did you do on the Quilty Quiz that I posted a few weeks ago?  I hope you tried it!  No one sent in their answers, though, maybe because it would take too much time to type in everything?  That's OK; this is just my own quilting journal/journey.  But NO PRIZES!

So it's time to post the answers, at least everything that I came up with.  If you go back to the original post (where the photos are much bigger) and spot anything I didn't find, do post it in the Comment section below so that everyone can see it.  And now for the Great Reveal!

 Alligator, awning, argyle, apple, asparagus

Bear, birdhouse, bee, bread, bowl, barefoot, blue (striped dress)

Cow, clock, clouds, curtain, checkered, cabin, cake, cherry, cat, cup, chaps, cane

Donkey, daisies dawn, duck, donuts, Dutch oven, door, doorknob

Elephant, earmuffs, eat, eggplant, embroidery, evening

Flamingo, farm, fruit, frappe, fish, fence

Giraffe, gazebo, grapes, gloves, garden tools, green (roof)

Hippo, hat rack, hat, hibiscus, honey, hamburger, hurricane lamp, hen, heart, handkerchief, hassock, herringbone (wall)

Iguana, ice cream, ivy, ice skates, ice cream cone wallpaper

Jaguar, jar, jam, jungle (wallpaper), jump (on table)

Kangaroo, kerchief, kabob, kettle
Leek, lattice, lemon, lace

Moose, moon, mask, mittens, marshmallows, muffin, mountain

Nest, nuts
Ostrich, owl, onion, orange, olives

Pig, parrot, pumpkin, pancakes, perch, pajamas, picnic table, plank, plate

Quail, quilts
Rhino, raccoon, rose, radish, raspberries, red

Sheep, spoon, salt, shutters, snow, sill, soup tureen, sugar, socks, shoes, saddle shoes, suitcase, stove, sunflower

Toucans, two, tulips, tortoise, tea set, towel

Umbrella, under (the umbrellas)
Vulture, vegetables, vest

Walrus, watermelon, woods, window, winter, whiskers, wainscot

X-shape on fence, X (Roman 10) on pot, xylophone
Yams, yardstick
Zebra, zeppelin, zucchini

Sunday, June 2, 2019

Progress! A Finish and a Lesson

A new finish -- not even a UFO!


Do you remember the contest I posted a few weeks ago?  That panel is now a quilt for the newest baby in the family, my niece's little girl, Beatrix.  Her name means "bringer of joy," and she certainly is that, a much longed for child that has brought great joy to all of us.


After ditch-stitching around each of the alphabet squares in the panel, I attached the border and free-motioned a vine pattern in the border.  For the squares within the panel, I decided to do a straight-line pattern emanating from a corner in the square.  I chose the starting point depending on the picture, mostly from a top corner, but not always.


I used a monofilament nylon thread on the top and an Aurafil cotton on the bobbin to go with the backing.  I didn't want to have the hassle of breaking thead at the beginning and end of each line, but was relunctant to try to stitch backwards on half the lines.  After some experimentation, I decided to start each line at the origin of the lines, bringing up the bobbin thread and taking several zero-lingth stitches before sewing the line, then completing the line the same way.  No knotting or thread-burying required.  That method seemed to secure the somewhat slippery monofilament thread even better that tying it off.  And there aren't the over-stitched threads from back-sticthing.

Not bringing up the bobbin thread at the beginning resulted in a bit of a thread-mess on the back.


Whereas, bringing up the bobbin thread and then cutting it off later made for a nice, neat point where the lines converge on the back (and the top).


I chose a gold fabric for the border, and used the same fabric for the binding.  I wanted the panel to stand alone.  The gold fabric was kind of a French fleur-de-lis pattern; the quilting barely shows up at all.


I'm really happy with the way this quilt turned out.  The quilting shows up nicely on the back, although it blends in with the floral patttern on the backing fabric.  It shows up better in real life!


BTW, only ONE person responded to the challenge.  And that was my son, who saw it on my regular FB post.  Nonetheless, I'll share my answers in my next blog post.


Meanwhile, more on the flying geese saga

(Just a reminder, this blog is my journal.  It's not just for showing off pretty quilts, it's also for keeping track of lessons learned.  You don't have to read this part if you don't want to!)

Despite my enthusiasm for the no-waste flying geese method, I am still having trouble getting these units right.  Clearly I'm still tugging at corner when I'm pressing the second wing (or the first.  Or both).  

Fortunately, the method seems to be pretty forgiving, so even though the squaring-up can be tedious, the end results are usually OK.


The picture above shows a unit that I've trimmed up.  At first glance it looked OK, but when I line it up with the lines on the ruler/cutting mat, the lower left edge is clearly out of whack.  I'm think I can fudge it to make it work, maybe that corner can be "adjusted," maybe not.  I put a pin in the unit to alert me that some fudging will be required while sewing.


This one will be fine.  The seam allowance on the white wing will be a little shy, but nothing to worry about.


On the other hand, sometimes things work just perfectly. 😀


Happiness is trimming and having only a few threads left on the mat!


Happy June-and-summer-is-coming to all.  Next time, the answers to the what's-in-the-panel contest.