Tuesday, April 23, 2019

Some Fun for Your Weekend!


This was a holiday weekend for many people, with time away from chores (too rainy for yard work, anyway, at least around here) and time with family.  All generations of my family live far away, so I've had time for some quilting, but nothing ready to show you just yet.  So I've concocted a little quiz for you!  It isn't about quilts or quilting; no specialized knowledge is required.  (Although quilters, who have a reputation of looking for their mistakes from the Brooklyn Bridge, may have a leg up).

(Note:  this post was supposed to go on line over Easter/Passover weekend.  But it was delayed when our internet connection went belly-up.  After going through two routers and two modems, the cause remains a mystery, but at least we're back!)


Quiz time!

These wonderful pictures are from an alphabet fabric panel.  Your task is to identify as many items as you can in each picture that start with the letter in that picture.  There are at least four items in each picture.

Be aware that some of the pictures have two or three letters in them, but there are still usually four "hidden" items.  Watch for subtle elements in the picture -- not everything is a "thing." Also, the fabric comes from England, so be aware that some of the items may refer to an English, rather than an American, word.  And some things may refer to old-fashioned names that younger people may not recognize.  So this is a family affair!

Send me your answers along with your email address in the Comments section at the bottom of the post.  In a couple of weeks I'll post my list as well as anything you found that I missed.  A winner will be chosen by drawing from a hat one name among all those who found everything in my list.  There will even be a prize!   Enjoy!


Aren't these drawings wonderful?!  Just enchanting.


Keep an eye on the wallpaper!

Hmm. what kind of house are these animals living in?


You did it!  I'll look forward to hearing from you with your answers!

Monday, April 8, 2019

In For the Long Hall

No, that isn't a typo!  Ha ha ha!

Almost done with the Otsego Lake twin bed quilts!  The journey started here and has continued on and off for eight years.  With the tops done and the backing purchased, I got some wonderful bamboo/cotton blend batting.  Now it's time to take everything to Clemencia for the quilting.

The backing (which I showed you here) was about 10-1/2 yards long -- not wide enough for the quilts, so four lengths to have enough for a vertical seam.  No way I could actually measure this, so I folded in half lengthwise to fit in the upstairs hall,  then unfurled it along the hall so that that I could fold it in half and then in half again..  Voila!  Four pieces of fabric long enough for the quilts and two widths each for the pieced back.


It worked out just fine.  Plenty of extra fabric on each side for the longarmer, and I'd calculated the length pretty well, I think.

In the photo, I'm standing in front of the spare bedroom where I keep the ironing board (steps between my sewing space and ironing space to keep my Fitbit happy).  To your left is my sewing space, to the right the master bedroom.  Fortunately, the fabric didn't have to extend into the bathroom at the end (yuk!).

I'll be so happy to have these quilts DONE and shipped off to my brother to schlep up to our cabin. 


Friday, March 22, 2019

New Finish, New Start

Easy Street is on the Bed


As some of you know, I am a fan of Bonnie Hunter's Quiltville blog.  I started Easy Street, one of her annual mystery quilts, several (!) years ago, right around the time my son got engaged.  Since then, he's gotten married and they now have three wonderful kids.   If you've been reading this blog for a while, you know that I've made my son and daughter-in-law a wedding quilt, quilts for each of the kids, plus quilts for several nieces and nephews, a Quiltville leader-and-ender project (more on which another time), and other miscellany.  But at last, Easy Street is done!!

I dropped this project several times, not just because of other priorities, but also because I because discouraged.  Nevertheless, I persisted.  Once the blocks were done, I was so excited to finish it.  Adding the first border was a challenge -- the quilt wasn't particularly square, and all of the edges -- **ALL** -- were the bias edges of triangles.    The quilt was too big to even try to do on my DSM.  The quilting was done by Clemencia Ramos in teal.   I am thrilled with the result.


Not having a clue about what I was getting myself into, I decided to make this quilt because of the colors.  For me, it wasn't "easy street," but I sure learned a lot!  The backing is a pretty print of violets in the same colors as the top, more modern than traditional, but a perfect complement
.


On Ringo Lake

With Easy Street done, it was time to start a second Quiltville mystery.  Once again, I fell in love with the colors, never mind the pattern.  This time I got a little smarter and waited until the reveal to go ahead with selecting fabrics and diving in.  So far I've finished Clue #1 - 50 nine-patches in teal, brown, and white-to-beige neutrals.


 Some of the teals and neutrals are left over from Easy Street.  Sweet.   I'm looking forward to the next clue, in corals and peaches.  Yum!

Sunday, March 17, 2019

Music and Love


Happy National Quilting Month!


... and National Quilting Day, too.  It was yesterday, but I didn't celebrate because I was away (enjoying the last day of a lovely, warm week in Florida).   But I do have a recent finish to share with you.

Music and Love


Music and Love was intended to be a housewarming gift for our dear friends Gordon and Diane, who moved last summer from Delaware to North Carolina.  I'd had the fabric for a long time, but now was time for it to see the light of day.

The fabric had a music theme, and the pattern was "Xs and Os" from Missouri Star Quilt Company.  Gordon and Diane were both musicians and teachers, and the kisses (Xs) and hugs (Os) were for their upcoming 54th wedding anniversary.

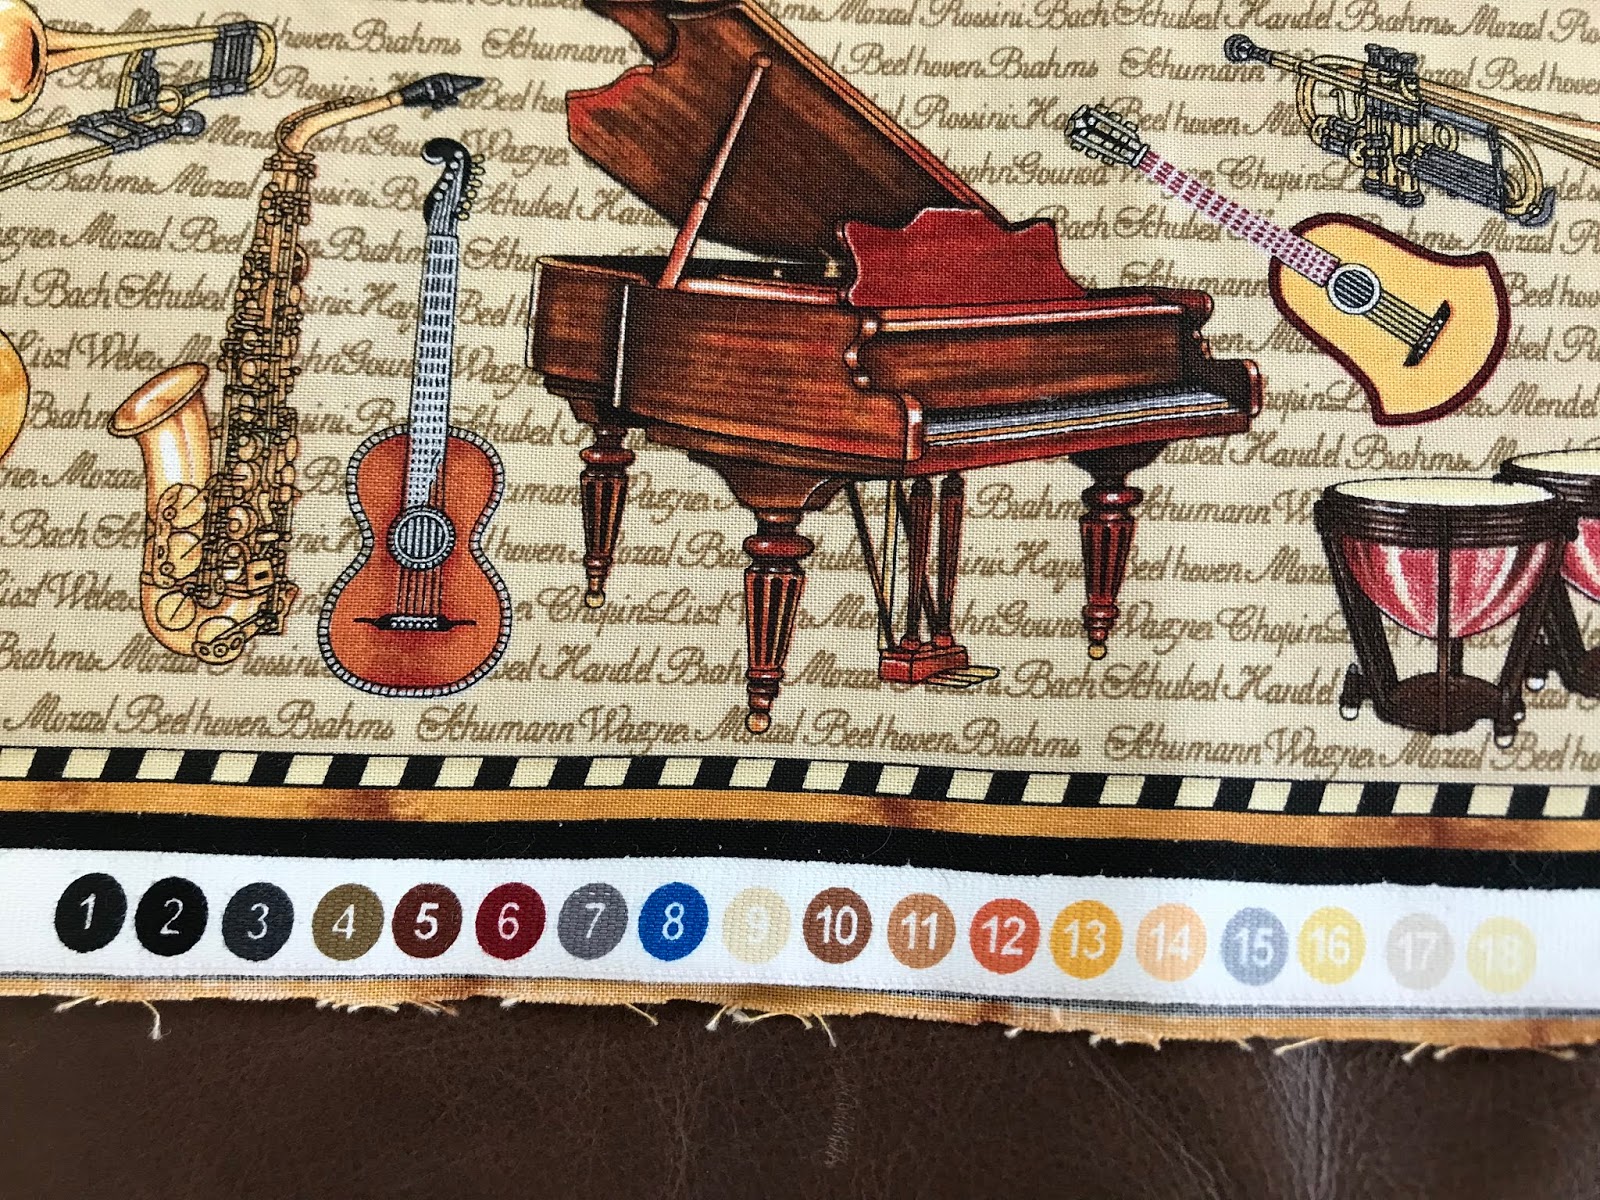
The pattern was quick and easy (as usual from MSQ).  Two charm packs of a print and one of a light neutral (I used a dotted cream).  The print I used was Perfect Pitch from RJR.  Check out the colors on that selvedge!


Snowball the 5" print squares by sewing 2-1/2" neutral squares to each corner.  
Press the neutrals out and trim back to a 5" square.   Voila!


Except that I decided to have a little extra fun!  I sewed a second seam 1/4" away from the main seam before trimming off the triangles.  


Please ignore the line to the left of the seam.  I put the square down backwards!  The second line of stitching will be to the outside of the first seam.


Voila again!  Handfuls of tiny half-square triangles.  Two charm packs = about 80 squares = 320 HSTs!  I was thinking of using them in a border, but decided against it in the interest of time.  I wonder what they will become?


Put 4 snowballed squares together and there's your block.


Sew up the rows and columns and you're done.  I fiddled with the layout to try to get the colors more-or-less evenly distributed.  And I pressed the seams open, since pressing them to the dark side posed nesting issues.


For the quilting, I sewed down the middle of each line of Xs, then a line around the inside of the neutral squares and one between the first two lines.  So three lines in the Xs and one in the middle of each block.  I used my walking foot, and turning the quilt in circles under my small-throated machine was a bit of a pain.  But I like the result.


The binding is made up of short (12" - 16") strips of one print in several different shades.


Sadly, Diane passed away last fall.  But her name on the quilt, as he requested, will be a sweet reminder for Gordon.


Saturday, March 2, 2019

Back(s) to Quilting!


Hi, all!  Happy National Quilting Month!

I'm baaack!


It's been a long time.  I've been so busy quilting and just haven't made the time to post anything.  But this blog is really my Quilting Journal, the one place where I keep photos of my quilts and the process I went through to make them.  March is National Quilting Month, the perfect time to get back in the saddle and share the journey along A Quilter's Path.  This post is a composite of several unfinished posts from 2018...

What is your favorite part of quilting?

There are those who love the beginning -- discovering an inspiring view or idea or even a captivating pattern, or finding a beautiful fabric that cries, "Take me home!"  Some find relaxation in cutting and piecing.  For others is the quilting process itself, making lovely designs that please the eye in themselves and that add depth and movement to the quilt.  There are even people who enjoy just sitting in front of the TV, sewing on the binding, and feeling the satisfaction of a quilt COMPLETED!

I guess for most of us, it's the whole process.  Otherwise we'd probably never finish our quilts!  I don't much enjoy the actual quilting, probably because I still haven't become skilled at the kinds of quilt designs that I want to make.  Otherwise, I love it all.  But one of my favorite parts is rarely mentioned -- finding the perfect backing.

The back is part of the quilt, too!

We're all familiar with the photos of gorgeous quilts, draped over the corner of a door, over a fence or railing, wrapped around a young child.  Sometimes you get a peek at the back in these photos, or perhaps the quilter has folded back a corner for you to see it.  But think about it -- when you turn down the bed or toss a lap quilt over your knees, you always see the back!

I love finding the perfect backing for my quilts.  I made one quilt -- one very important to me, the one for my son and daughter-in-law for their wedding -- where I used a plain muslin backing.  Lots of people use muslin for the quilt back -- it never detracts from the top, shows the quilting, and is inexpensive.  But in the end I was disappointed.  If the top was so important, why didn't I bother to find a nice fabric for the back?

To me, the right backing material complements the top.  If the back has to be pieced, that's even more opportunity to have what is effectively a two-sided quilt.  Here are some of my favorites.


I made this panel quilt for a niece's baby boy in Ireland.  The African theme suggested warmth, something often lacking in Ireland!  


So I made the backing with a warm flannel in the same colors as the top.  It showed off the quilting nicely, too.  Aligning the back with the top so that the quilting aligned correctly on both the top and the back was something of an effort, but in the end, I was quite happy.


This lap quilt was for my best friend and her husband -- and their dogs!  The photo was taken before the quilting was done.  I stitched the names of all their dogs over the years in the horizontal sashings.


Of course, there was no shortage of dog-themed fabrics that could be used for the back.  The one I chose added a little pop of color that was missing in the brown and dark red top.


Sifting through old posts, you can find my *very* gradual progress on my Otsego quilts -- a pair of twin-sized quilts that in my earliest quilting days I optimistically designed, poorly cut, and struggled to sew.  Over the years I would pick one up to work on, usually during a retreat, when I forced myself to push on by taking only that project along.  But once I got home, back it went in the UFO bin.

This summer I finally finished both tops.  It took a while to find a backing fabric that I loved -- found it at Hobby Lobby in Gaylord, Michigan.  Perfect.


The last back I'll show you today was for another baby quilt.  I've made this one before -- just a couple of charm packs and some yardage.  


I wanted flannel for the backing, but when I saw these little guys, the deal was done.  So sweet!


That's it for now.  We'll be baaaack!  


Friday, August 3, 2018

June's Modern Ombre

A Modern Quilt for June


As I've proceeded along A Quilter's Path, modern quilts have increasingly appealed to me.  When I saw the post on See Kate Sew for the Modern Ombre baby quilt, I knew that this is what I wanted to make for my newest granddaughter, June.  I just wanted to jazz it up a little.  (Click on the link to see the original inspiration).

Wandering around the web, I discovered a fantastic fabric by Laurel Burch.  This became the focus fabric for June's quilt.


I swapped out the black and white print in the original pattern for lavender; I thought a print wouldn't work with the black print.  The color scheme is definitely informed by June's older sister, Greta, who's all about pink and unicorns.  For all I know, June may end up being a girl who wears all black and wears boots in the summer and has pierced I-don't-want-to know.  But for now, pink.

Since the entire quilt was triangles, I starched the bejeezus out of the fabric before cutting.  I wanted to fussy-cut the Laurel Burch fabric to make an I-Spy quilt.  But the template in the original pattern didn't quite work for the fabric.  After an entire weekend of fiddling around, I finally came up with a shape that allowed me to isolate one animal at a time (mostly).  The giraffe was hard!  Fortunately, I had some template plastic that allowed me to see the animals and still keep a seam allowance.  I marked the black fabric with a chalk pencil and cut it with scissors.  I wanted to preserve every possible inch of fabric.


If you look closely, you'll see that the outlines on 
the animals are metallic gold.  Lovely!


For the solids, I just cut strips the height of the template, then used the template to mark the strips and cut them with a ruler and rotary cutter.


I fiddled around with the layout, playing with the colors, since they didn't match exactly the original pattern.  But it ended up that Kate's layout was the best option (thank you, Kate!).  Once I'd selected the layout, the rest was a piece of cake.


On the design wall.

Other than the agonizing over layout, this was the quickest quit I've ever made.  No seam-matching until I put the rows together!  And no border.  I wanted the quilt to speak for itself.


I quilted straight lines on either side of the seams -- simple, geometric, keeps the modern feel going.


For the back I used a gray print that I've been ogling for weeks at the store.   I had actually talked one woman into buy the fabric for her quilt, so I kinda hoped that the store would give me a discount.  No such luck.


The binding is a flannel zebra stripe that I'd used on another baby quilt about a year ago.


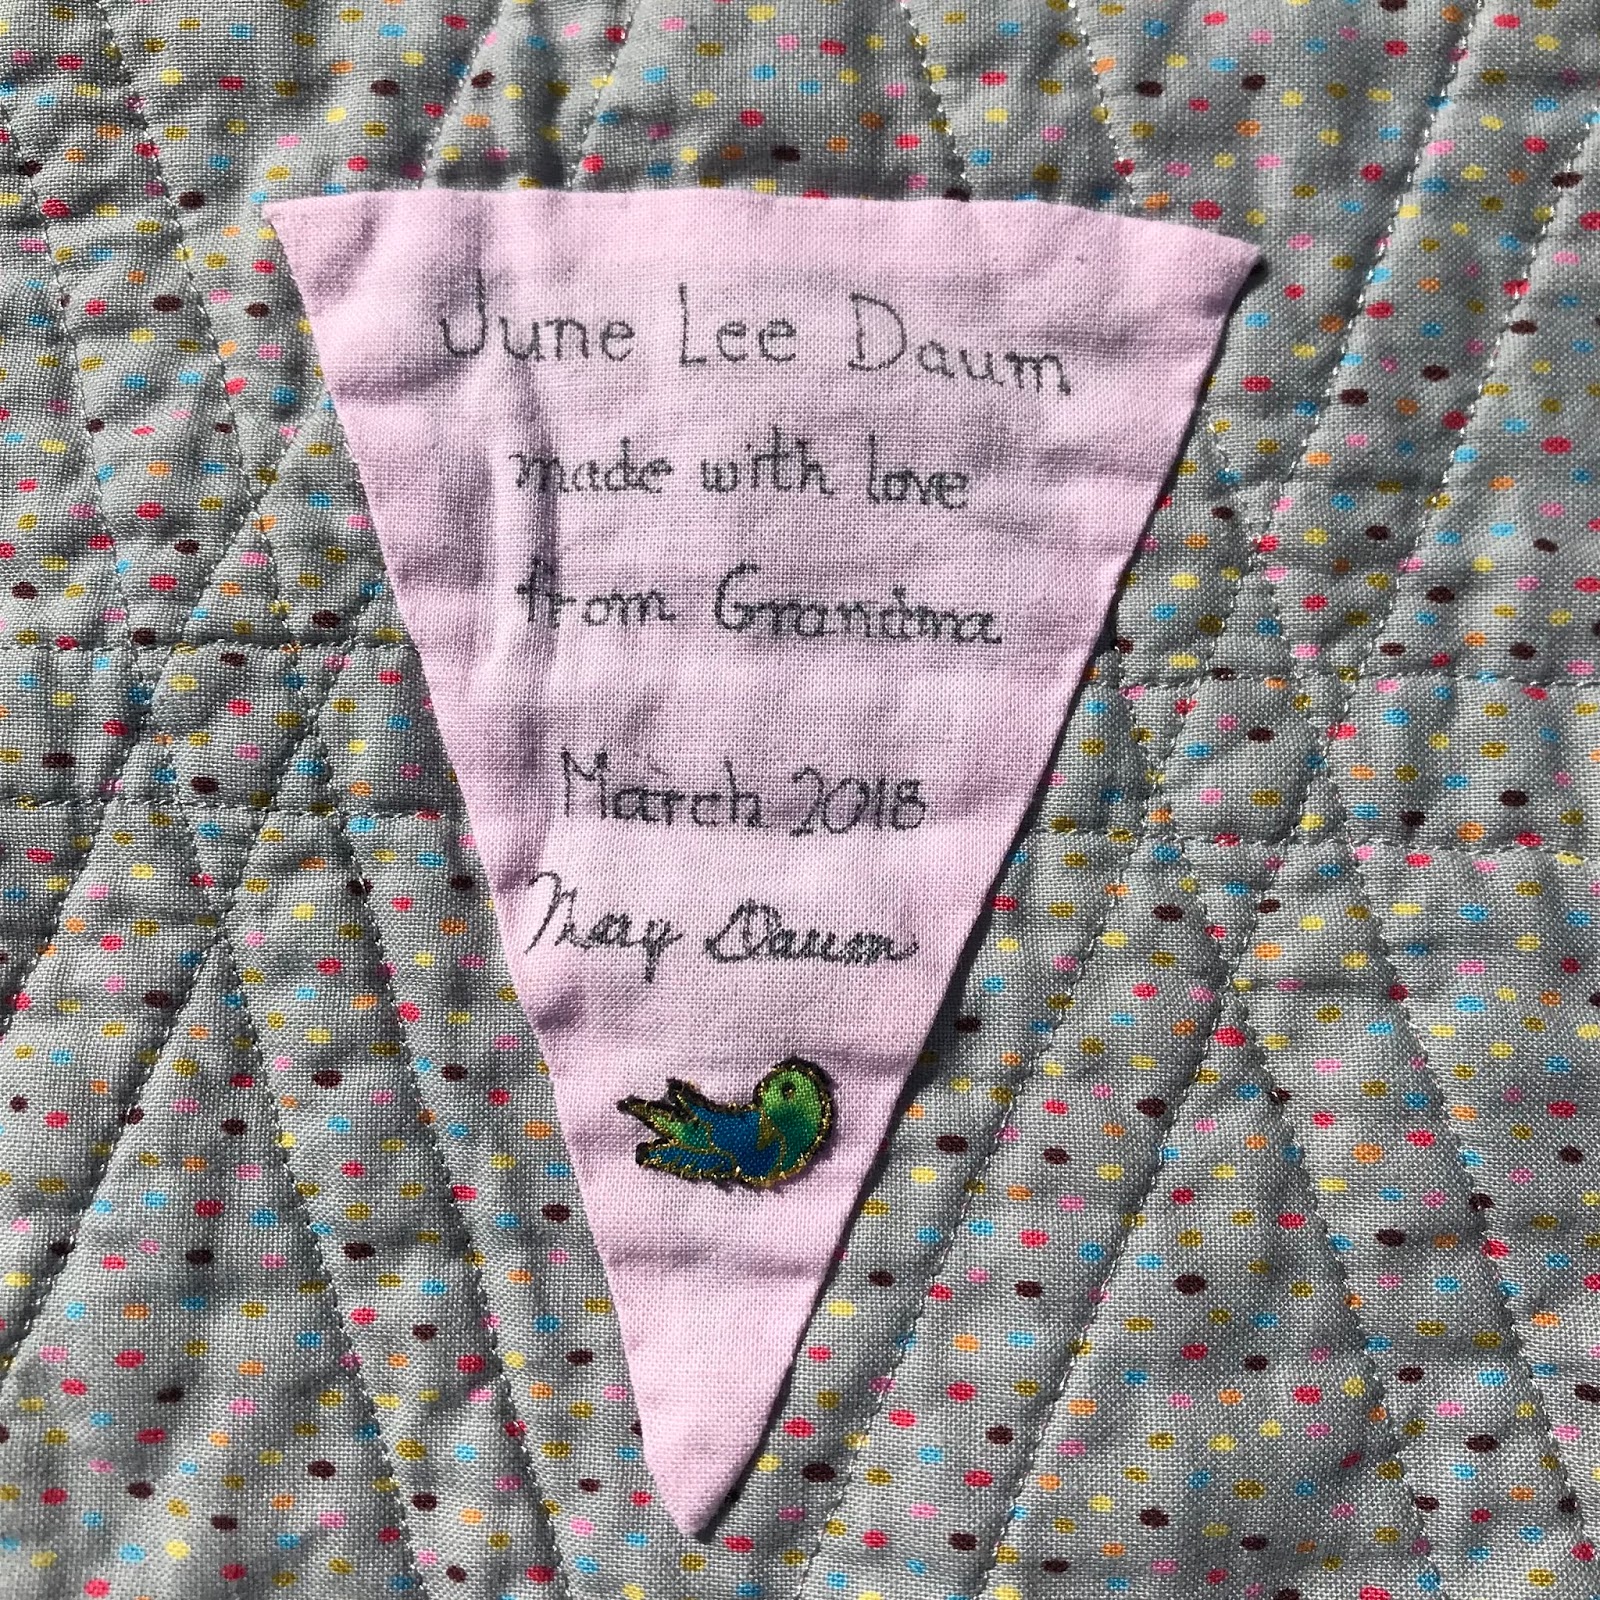
 For the label I used a leftover pink triangle.  I love the way it looks on the back of the quilt.


And for an added touch, I cut out a tiny bird from the animal fabric and appliqued it to the label.


 P.S.  I didn't want Greta to be jealous (her quilt wasn't pink).  So I made her a pillowcase with leftover triangles and backing fabric, a pink stripe (to make it long enough) and some white eyelet trim.


Back with more soon!


Sunday, October 29, 2017

Rail Fence Checkers

LEADERS AND ENDERS

I'm not a big fan of the rail fence pattern.  It's just not my style.  But when Bonnie Hunter came up with the added checkerboard units, I decided to make it.

I was getting ready to head to Otsego Lake for 10 days of solo time, so I bagged up the pieces for the fireplace quilt and kitted up what I needed to get a good start on the rail fence.

For the checkerboards, I have plenty of solid black, and both solid and tone-on-tone white fabrics.  i started strip-piecing them and already have a nice bag full of 4-patches.  Each block will require three 4-patches.


For the rails, I emptied my bins of 1-1/2" and 2" strips and squares and started in.  This would be my first totally scrappy quilt, but I did want at least to have some balance among light, medium and dark fabrics, plus a variety of colors.  I cut 6-1/2" lengths of pretty much everything I had in those widths (trimming the 2" strips to 1-1/2"), then dug into the color-sorted stash bins.

Being an OCD-type, I didn't want to waste a thing.  So I had 5 piles going:  strips 1-1/2" x 6-1/2" for the rails; squares of various sizes from strips less than 6-1/2";  selveges for a future project; dog bed filler (pieces narrower than 1-1/2"); and shreds-and-threads that actually had to go into the trash.  Note, that is the smallest pile!

Piles piling up!  (Please overlook the leftover lunch plate). Pieces for the dog-bed bin and shreds on the left.

Fence rails

Squares (5", 2", 1-1/2") and selveges
I sorted the rail strips into color families and took a photo of each group.  Then I made a copy of each photo and converted it into gray-scale to determine whether a fabric was light, medium, or dark.  Some fabrics surprised me, not what I thought they would be.


This is the teal family.  They look mostly pretty much the same to me; the 3rd and 4th from the left in the bottom row are certainly darks, but the others...?


But looking at them in gray-scale, the differences do show up.

I think the dark area on the left is just the hole in the sewing table where the machine goes.  My machine was getting its well-baby checkup when I took these pics.

Do you know that they sell special red glasses for quilters that enable you to see your fabrics in gray scale?  I'm sure there was a reason for them back in the day.  But almost everyone has a cell phone now with a camera.


Since I was sewing these on three different machines, I measured them again before I sewed a light/medium pair to a dark/medium pair.

I've made a couple of blocks but I'm still not sure I like this.  Bonnie Hunter says that "if it's still ugly, you didn't cut it small enough."  Well, these strips aren't all that small, I deliberately did not try to pair up strips according to color, and I was using up a lot of fabrics that I didn't like in the first place.  Oh, well, it's all just for fun.  And who knows what it will look like when it's done?  (You will, dear readers.  But it will be a while).

Have a happy Halloween!