Wednesday, June 6, 2012

Odds and Ends

Time to start a new project and stitch away at my sew-alongs.    For the new project I'm debating between (a) a Halloween applique table runner that's partly started and (b) the fireplace mosaic quilt that I showed you earlier.  The calendar says (a); my heart says (b).  Maybe I'll start the fireplace and take the applique with me when I return to the lake in a few weeks...

Fifty-four Forty or Fight

This is the May block in the Simple Sampler BOM at PQ.  This time the finished block will be 12" (the first one was 9").  It'll be really interesting to see how we put all these different-sized blocks together.  For this block I used the Tri-Recs rulers that I got a year ago but have never used, mainly because I haven't had (or at least recognized) any blocks that they'd apply to.

Fifty-four Forty or Fight


I had to swap out the white fabric that I was given for some in my stash because I cut it wrong initially.

I sewed this on the little machine in Michigan, so the seams are a little big and the block is just a little small.  Not enough that it couldn't be fudged, except that two of the points are right up to the edge.  Guess they'll just be a bit blunt when the quilt is finished.

This is the biggest block I've ever sewed -- what a treat after all those tiny HSTs in the Battlegrounds block!

Bonus Blocks from the Barrister

Randi from the Barrister's Block Sow-Along posted two bonus blocks last month.  The first one was a Battlegrounds variation which I've learned is called Gray Goose.  The units are the same -- 16 scrappy HSTs -- but they are arranged differently.   The little Singer came through on this one!
Gray Goose


Most of the dark fabrics came from a bunch of 4" precuts that I'd picked up on sale.  There was waste from cutting 2-1/2" squares from these, but the remaining fabrics in each set weren't my favorites (I'd already used those!), so I didn't mind.  The gold batik and the dark greens came from the new fat quarters that I'd picked up in town.


Lemoyne Star

The second bonus block was a Lemoyne Star variation.  I did the HSTs at the lake, but finished the block at home.  The final block is really disappointing.  I don't know if it's because of the different seam sizes or what.

The good news is that Randi is only giving us two new blocks this week, so I should have time to make another one of these.


Civil War Block Swap!

I couldn't resist!  The ladies at Pieceful Quilting are doing a Civil War Block Swap.  Everyone who participates will make 12 identical Double Monkey Wrench blocks using only Civil War reproduction fabrics..  We'll turn them in at one the two PQ shops by September 1 and a week later we'll get 12 blocks, all different fabrics from different quilters.  We'll get instructions to piece the quilt top (I think there will be sashing involved) and then have a Big Reveal party in November.

Double Monkey Wrench

 I was concerned that my blocks wouldn't be good enough, but it's an easy block.  No point-matching, just linking up seams, which is one thing I can do.  But quelle horreur!   Just as I was squaring up the last side, my hubby stuck his head in the door and surprised me.  The ruler slipped!  Ack!!!!

If this were just for me, I'd fudge the seam when I put the quilt top together.  But I can't turn this one in!  Guess I'll run back to the shop and pick of fat quarters of two blue fabrics and replace the corner HST.  Grrrr.


Sunday, June 3, 2012

Peconic Quilt Show 2012

Home Again, Home Again


Foul weather in Baltimore left me stranded in Detroit overnight, but I arrived home yesterday at noon, just in time to grab a peanut butter sandwich and head to the Eastern Long Island Quilt Show 2012.  It was in three buildings at an area community college -- fun!  I learned my lesson from the last quilt show and took my real camera with me this time.  Herewith, photos from building #1, the exhibit hall.

 Loretta's Garden

This beautiful appliqued quilt won first prize in the "Applique Large" category.  It was one of the first quilts you'd see as you walked into the exhibit building.  Though I admire applique more than I actually want to make something like this, there's no question that this deserved its prize.  It was a very large quilt (~ king size).  Not only was the stitching flawless, but the use of color and attention to detail was just astonishing.

Loretta's Garden by Marie Nigro

Look at the beautiful embellishments, the dragonfly and the tiny ladybug, just about life size.  You wanted to put her on your finger and say "Ladybug, ladybug, fly away home..."  See the butterfly in the next one, too.


 Different quilting techniques were used in different areas, even in the same fabric, to add texture and highlight different parts of the quilt.  It's machine quilted (I'd love to see the back!).


 Round Robin

There were eight round-robin quilts done by members of one guild.  Each member created a center block, then passed it along to the next person, who added a border, sent it to the next person, and so on.  The original quilter then bound and finished the quilt.  I only took pictures of two of them, but you can see how gorgeous they are!


Purple Serenity by Cathy Barta
Three of the Material Girls' quilts won a prize, and three got an Honorable Mention.  I'm glad I didn't have to judge these!

Surrounded by Friendship by Pat Bandura
Civil War Quilt

I love the colors in Civil War quilts.  This photo doesn't quite capture how gorgeous this was!

Civil War Tribute by Sharon Chimento


Here's a close-up of one of the corner Bear's Paws.  This quilt was quilted in a more open pattern than most of the quilts.  I like the curls that kind of balance out all the sharp points of the triangles in the blocks and outer border.


Fireworks!

Although I prefer muted colors to primaries, this one was amazing.  As you can see, it won a first prize (in the Pieced Large category).  Doesn't it just look like bombs bursting in air?  You can almost hear the boom and see the bright stars raining down.

Fireworks 4th of July by Beverly A. Delaney

And Now for My Favorites!


Here are the quilts that I  particularly enjoyed for strictly personal reasons -- just something about each one struck a chord with me.

Strings

This quilt was intriguing, because it combined strings of scraps with black triangles that gave it an Amish look.  The concept is very simple, but it's really eye-catching.  This gets my personal Honorable Mention.

Almost Amish by Paulette McDonald

O Tannebaum!

My Third Place award goes to this wonderful Christmas tree made out of teeny-tiny log cabin blocks.  This was a small-ish quilt, maybe 18-20" high?  Ten rows vertical, so each block was max 2".

Log Cabin Christmas by Barbara Downs
And look at the size of the strips in the blocks.  I'd guess that each one is half an inch, finished.


Moonstruck


I love mosaic quilts, and this one was really different, so it gets my personal Second Place award.   (Besides, Moonstruck is one of my all-time favorite movies).   It's not a true mosaic, but is made up of a bunch of different 9-patch blocks.  Squares from fabrics used in the blocks make up the outer border.  Each cat is quilted differently, so even the three black ones look a little different.

Moonstruck by Roberta Garris


This is a closer view of the sky area.  How cool is this quilting, with all those twinkling stars!


 TA-DA!  First Place!

Should Da Been Candy by Alice Hasselback
 Whaaaa???  Why this one?  The fabrics are pretty, but what's so special about this one?  Read on...


Ha! Ha!  Gotta love this girl!  Not only did she ignore the whistle from the Quilt Police, but she entered the quilt in the show!   You can see that if those colored do-dads in the light background areas were turned, so the points met the corners of the four-patch squares, they would look like a twisted candy wrapper.  So what?  Kudos to Alice! 


Monday, May 28, 2012

Catching Up!

Despite the nice weather here in northern Michigan during the past week (mostly), I managed to catch up with all Randi's Sow-Along blocks.*  I was behind because I'd been madly trying to finish quilting and binding a quilt for my friend before she came to visit.

This quilt-along is wonderful opportunity to learn.  The assumption is that the participants know what they are doing, but that's not necessarily the case (c'est moi!).  My final quilt will NOT be going to show-and-tell at the quilt guild.  But I am gaining so much experience along the way!

* Oops!  I just noticed that she posted a Bonus Block yesterday.  Oh, maaaann!

Union Square


I'd only managed to sew up one of the six blocks from the May posts before I headed north.  This one is called Union Square.  There are a few wonky spots, but I like the colors.


Once I got up to my vacation home in Michigan, I started in on the rest of the blocks -- sewing machine at one end of the porch table, eating area at the other end (after I'd cleared out my cutting mat and a few hundred dog's ears!).

The issue that I ran into was the lack of a quarter-inch presser foot for my machine.  As I mentioned in an earlier post, I found a ruler that made easy work of the HSTs.  But I could see that my effort to mark out a stitching guide on the machine wasn't working -- for whatever reason, the seams were just too wide.  So some of these blocks look OK, but they are undersized.  (BTW, I have ordered a presser foot that should arrive tomorrow.  Whew!)

Fruit Basket


This block has muslin as the background.  It's a bit hard to work with, but I really like the look.

Fruit Basket

Battlegrounds


This is a Battlegrounds block.  It is based on a pattern by Lori Smith (the full attribution was unavailable when I printed out the directions).
Mini Battlegrounds

I had cut out all the squares to make the HSTs before I left home.  Unfortunately, when I stitched up the block, it was waaay small (more like 4-1/2" instead of 6-1/2").  Ack!  It turns out that the directions never said how big to cut the squares.  Lacking much experience, when I read "HSTs 2" unf.), I cut 2" squares.  After making the same mistake a second time, I sat down with Quilt Pro and figured out that 2" unfinished HSTs required starting squares of 2-1/2".   Third time's the charm!

Silver Lining


By now I'd used most of the 4" squares that I'd brought with me for just-in-case.  I cut down some of the rest, but it was time to make a trip into town to Delphine's Quilt Shop.  Whoa!  They had a sale basket of fat quarters for $1 each!!!  Of course I bought way more than I needed for this block, but it was an offer I couldn't refuse!  This is the final block -- still a bit undersized because of the seams, but definitely an improvement!
Battlegrounds (Lori Smith)

Yankee Puzzle


That took care of the blocks from the first week in May.  Onward!  I was really happy with this Yankee Puzzle block.  The center came together perfectly!  The photo in the directions didn't show the final block, so I was happily surprised at the motion that appears here.  This block and the two that follow are from a book called Teach Yourself Blocks from the Past by Marie Henry (available on Amazon).

Yankee Puzzle

Aunt Sukey's Choice


Well, sometimes you win, and sometimes you don't.  I was pretty happy with the flying geese units here (the fabrics are particularly nice to work with), but there's some real wonkiness going on (maybe I can tug a bit when the blocks are assembled).  Not to mention that I had the light fabric backwards in one square!  Hah!  That's what makes it unique, right?
Aunt Sukey's Choice

Road to Fortune


The colors in this block are pretty -- they don't show up so well in the photo, but the outside dark triangles are a midnight purple, really striking.  I did this one kind of scrappy, and I think the effect is good.

Nonetheless, the block was actually a bit of a disappointment for me, even though the construction looks great. Since the directions didn't show how to sew the units together, I tried to find the block on the web, but came up empty-handed.  I did my best, but I'm not sure that the outside triangles are put together right.  Maybe finishing the block will help.  Any ideas???
Road to Fortune

TBD


Well, one thing to look forward to from this project is a few more orphan blocks!  The directions for the Fruit Basket block give you enough pieces to make a second block.  I did the initial piecing and will finish it sometime.  The little squares in the photo below are from the second attempt on the Battlegrounds block.  The HSTs are stitched but not cut -- it was clear that they were too small.  I guess I'll put them together at some point.  And because by this time I was out of my mind, I miscalculated the number of squares I needed when I finally cut the 2-1/2" squares, so I have a complete second set of HSTs ready to go.


Thursday, May 24, 2012

My Northern Studio

My Otsego Lake quilt (or at least some pieces of it) have come home.  I've set up my "quilting studio" in my cabin on the lake for a 10-day one-person retreat.  It's a bit primitive, but it works (more or less).  You can see the lake through the windows (hence the glare).


Yes, that's a picnic table on the front porch.  The machine is a little Singer, devoid of doo-dads, that I picked up last summer for $89 at Meijer's Thrifty Acres.  I spent the last few days before I came up here cutting the pieces for the five quilt-along blocks that I'm behind on and the block for my Simple Sampler class.  I also brought along my small cutting mat and other tools and a bagful of pieces for the Otsego Lake quilt.

I immediately ran into an unanticipated problem.  The Singer doesn't come with a quarter-inch quilting foot.  I ran a strip of freezer tape over the machine bed to mark out the quarter-inch line, but I couldn't use it to sew the the half-square triangles, since the squares cover up the tape.  After much head-banging I drove back into town to search for a solution.  I found a little half-inch ruler with a marked center line.  You just line the center on the diagonal of the square and mark along either side for your sewing lines.  This puppy is going to get a work-out!


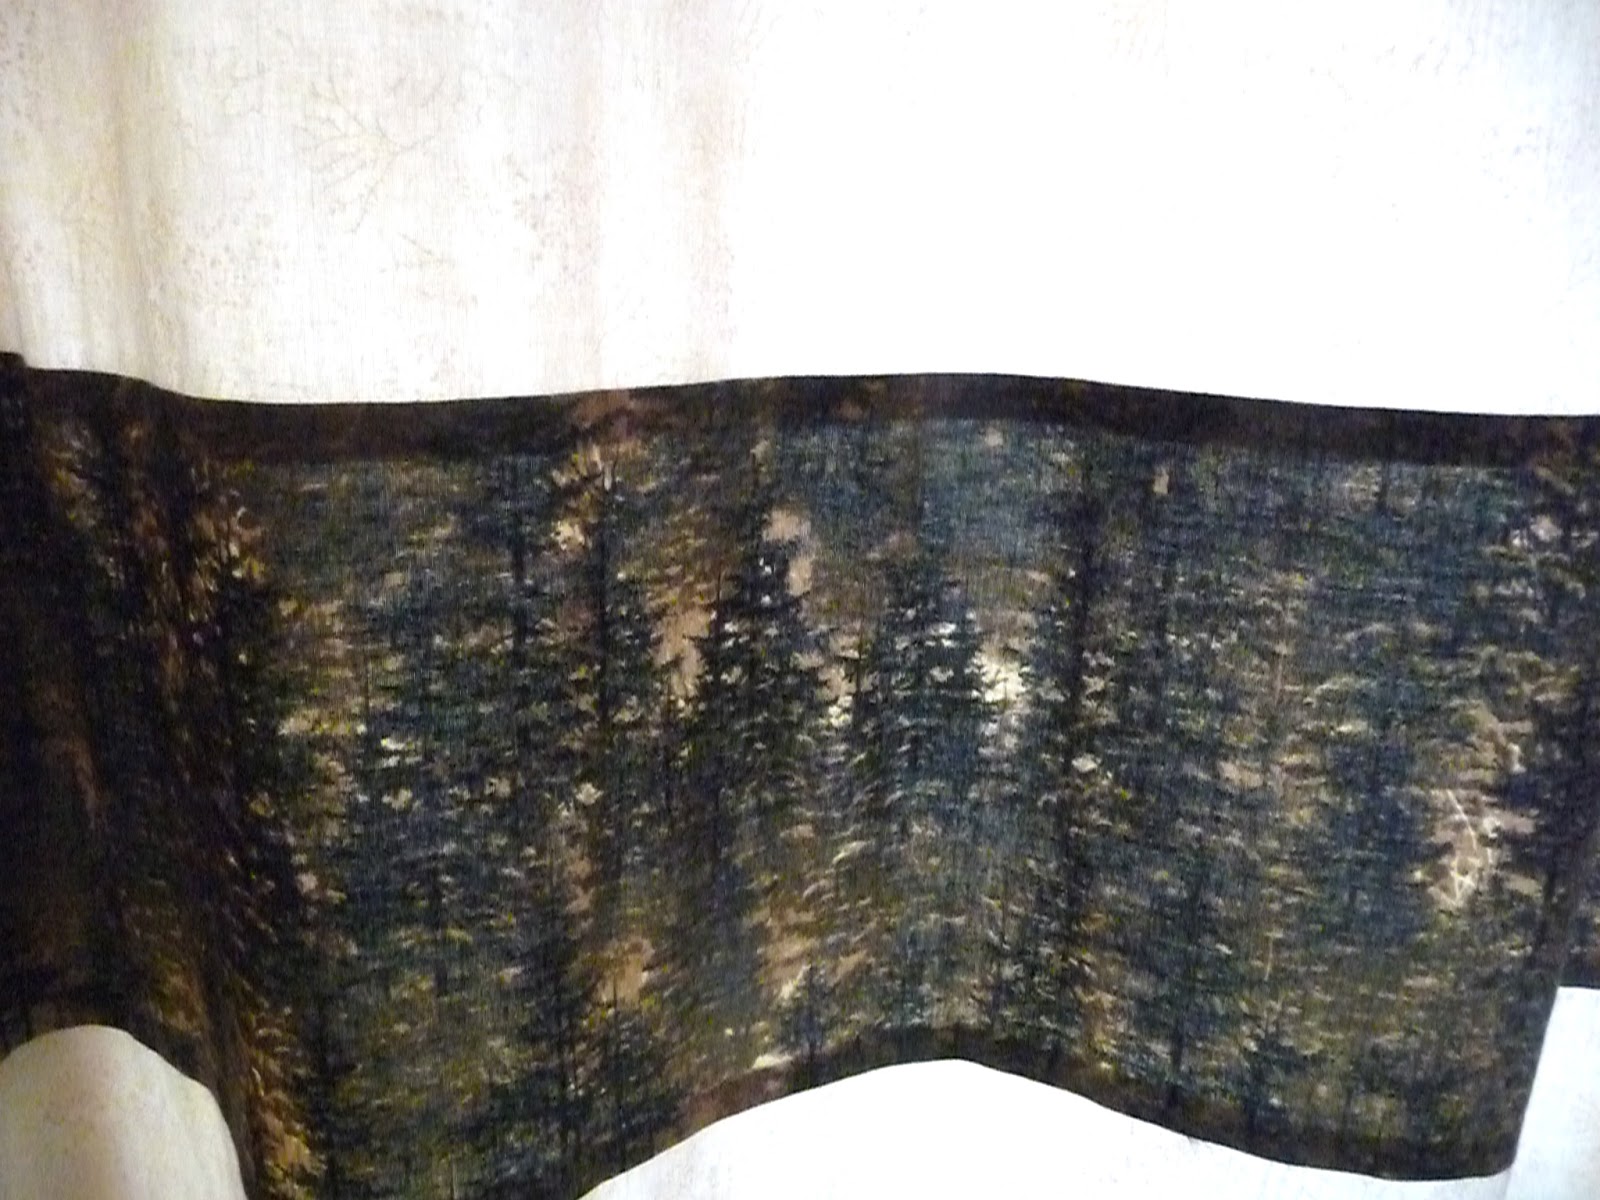
By the way, these are the curtains that inspired the Otsego Lake quilt.  I made these last summer; the light and dark are the fabrics that make up the centers of the two alternating blocks in the quilts.


Below is a close-up of the "woods" fabric.  Now that I see these again, I'm thinking of maybe adding a narrow strip of red above and/or below the woods, to go with the red squares in the quilt.  But that will wait for next summer -- I want to see what the quilts actually look like, first.


These are the Otsego Lake blocks...
 

Thursday, May 17, 2012

Kathy's Clowns

Remember Q-911, the quilt that needed emergency treatment to survive?  It is finally done and can now be revealed as a gift for one of my favorite people, my dog-loving friend and cohort in childbirth, Kathy.  We were roommates in the hospital when we each had our first child, and despite a thousand miles between us, we still have such an easy friendship.  So when she retired from teaching, I wanted to make her a special quilt.  I found the large dog-print fabric and started from there.  You can re-visit previous posts for the backstory. 

Kathy's Clowns

Anyway, I learned a lot about free-motion quilting while making this quilt -- one of my goals for this year.  The quilting in the blocks is better than that in the sashings, which I did first.  The sashings are stippled.  The names of each of Kathy's dogs are quilted into the horizontal sashings, flowing from the stippling and back again.  The quilting in the vertical sashings ends in a heart where it meets the horizontals.


I used the same paper to quilt the names that I used to quilt the Charming Baby quilt.  I found a font that looked nice and could easily be quilted, copied it onto the paper, and pinned each name to the quilt.  I used a fine-point permanent marker, so if any tiny bits of paper were left, they wouldn't stain the quilt when it was washed.


It was easy to tear away the paper after the quilting was completed.


For the blocks (rectangles of the dog print), I just stitched around the dogs on the outside edges of each block and then around each separate dog in the center.  It's not echo stitching -- I really couldn't get a consistent distance from each dog, especially where they were really close together.  So I just went with the flow.  The end result was that I had to bury about 250 ends where I'd had to break thread. Not my favorite thing to do!


For the outer border I stitched three parallel lines in a variegated black/white thread called "Piano".

My original plan for the binding was a rust color, which I also used on the backing since I didn't have enough of the primary fabric.  But I really didn't like the way it looked as a binding.  Back to PQ, where I found a yellow/fawn fabric (same print as the dark brown inner border) that really pulled the whole thing together.


Backing with dark brown and rust inserts and "new" binding.

The main dog blocks, sashing and backing are all from the same group of fabrics (you can see the paw prints on the sashing and the blocks).  The backing is great -- the leashes and the loops from the quilting around the dogs fit nicely together.  I didn't try to change bobbin threads to match the backing, since the backing fabrics varied as well.


This quilt is called "Kathy's Clowns" after the old song and the fun that these dogs have brought to Kathy and her family over the years.  One of them, Niza, was my family's dog.  When we went away for a year to North Carolina on sabbatical, Kathy adopted Niza.  When they stopped in NC for a brief visit, Niza only wanted to be with Kathy.  Sad for me, but I was glad that Kathy and Niza loved each other.  She definitely deserves a place on this quilt.


Here's Kathy with Kathy's Clowns.

Friday, May 4, 2012

Mosaic Quilts!


Victoriana Quilt Designs posted a link to the most fantastic web tool!  The Victoria and Albert Museum in London has a site where you can upload a photo and turn it into a pattern for a mosaic quilt.  You can find it at http://www.vam.ac.uk/microsites/quilts/patchworkhttp://www.vam.ac.uk/microsites/quilts/patchwork.

You can select the shape (square, portrait or landscape), the number of colors (from 5 to 20), and the complexity.  For a square, that ranges from 10 x 10 squares to 30 x 30 units including squares and triangles.
Medium resolution (20x20, 20 colors)


Original photo
My approach had been to create a square grid (I used Excel) and put the photo behind it.  I printed out several copies and then started assigning colors to each square.  Eventually I decided to use triangles, as well, to capture the tips of the flames.  Using triangles, here's what the V&A Patchwork Pattern Maker came up with:

Advanced resolution (30 x 30 units with triangles, 20 colors)

It's amazing how good this looks!  It's hard to see it here, but try this:  click on the images of the original photo and this pattern and save both.  Paste them into a document, make them the same size and view them side-by-side.  Incredible!


The pattern includes basic cutting instructions as well.


I'm not sure which resolution I'll use.  I had planned to make a quilt 20 units across (plus a border) using 2" units (unfinished).  Using 30 units across, either the squares will be really small (not to mention the triangles!) or the quilt will be bigger than anticipated.  Or maybe I'll just do the medium version, which is basically what I'd worked out before.  Either way, I'll need more fabric!  :-D