My One-Block Wonder quilt top is done -- I just had to share it with you!
The inner border is a deep gold. The lovely Colleen from my favorite LQS found the fabric for the outer border -- on the sale rack!! It's a slightly uneven stripe with gold, rust, green and black. It looks like a piano key border, but no sewing required (except to attach it to the quilt, of course!).
I was stumped about where to spread it out, ended up taping it to the back fence. Note to self: seek a better system. Removing the tape pulled the loose threads out of the border!
This oblique view is washed out by the bright sun, but the stars really pop. It's amazing how these quilts change when you look at them from different angles.
Now I have to figure out how to quilt this baby. I've poked around on the web for ideas, but nothing really called to me. Let me know what you think. You don't have to sign in on Google and join the blog to comment! If you have a quilting friend, ask her (or him) to look at this and make a suggestion!
Saturday, September 29, 2012
Wednesday, September 26, 2012
Oooh, yes!
Irresistable!
The local Ben Franklin store in Gaylord, Michigan, is folding. My sister-in-law told me about it two weeks ago; she said that everything in the store was 30% off. The store carries a lot of quilting cottons, so as soon as I got here, off to town I went! Sad to see that the window that in July was touting AccuQuilt and many area quilt shows now looks like this.
Still...
So look at the prices today!
Open the door and find that the inventory is still quite large. These shelves are all autumn/Thanksgiving fabrics.
The rear wall is all novelty fabrics, with an emphasis on "north woods" themes -- fishing, hunting, canoes, woods, cabins with smoking chimneys.
Lots of kids' fabrics -- cartoon characters, cars, sports, princesses.
As if all that fabric wasn't feast enough, this sign was posted in the fabric section:
![]() |
| If you can't read it, the little note says that you get 40% off PLUS an extra 50 cents per yard! |
Many of these are good fabrics, too: Thimbleberries! Moda!

To think that someone at my Simple Sampler class last week noted that you don't usually see much red in Thimbleberries. Huh!

I've been on the lookout for something with a black background to make another One-Block Wonder [kaleidoscope] quilt. There wasn't enough of this fabric to make a lap-size quilt, but maybe I can get a few hexagons out of it for a table runner or some pillows.
This is what I ended up buying -- end-of-bolt for all four, so the most expensive fabric (the Moda) was only $8.50 per yard.
According to one of the employees, the store will only be open for another week or two. Guess I'll stop in every couple of days to see if the prices drop further. There are still 3 other shops in town, one with traditional quilting fabrics and oodles of pre-cuts, one with more modern fabrics, and a Hobby Lobby.
Enough talk about quilting -- time to do it! Unfortunately, it turns out that I somehow took all my bobbins and good thread home in July, so back into town I must go. Fun this morning; now, not so much.
Monday, September 10, 2012
The Kaleidescope Adventure Continues!
The One-Block Wonder Class is so much fun! I can't imagine doing a project like this without a few other people in a class to exchange perspectives.
So, I got all those triangles cut and spend quite some time figuring out the best placement of each group to create a hexagon. Then I sewed them all together, 3 at a time, to create half-hexies.
This can all be done by chain-piecing. You just have to be careful to keep each hexagon in order! You'll end up with two half-hexies that you pin together.
At the second class, we all arranged our hexagons on a piece of batting, then started moving them around to find a layout that we liked. This was stressful for me, because I didn't think that my fabric pattern was working. But everyone in the class liked it! :-D And everyone in the class (well, except one person) hated their fabric, too. But guess what -- all of the quilt layouts looked WONDERFUL! Can you see the stars and swirls starting to form? People suggested different ways to arrange the hexagons, and everything started to come together.
I'm so disappointed that I didn't take pictures of the other projects -- they were so nice, and every one was completely different. I hope everyone brings their completed quilt tops back for show-and-tell, so I can share these beautiful creations.
Now to start putting everything together. Each hexagon is arranged so that there is a continuous seam line vertically (line them up so that there is a point at the top, not a flat side). In one row, the line is between hexagons; in the next, it's down the middle (that's why we didn't sew our hexagons together before we arranged them). I don't know if you can see this in this photo. I need to figure out how to add graphics to these photos -- little arrows and comments.
When I got all my hexies lined up again at home, I started sewing them into vertical "rows" (AKA columns). I ended up with 16 vertical strips and tons of leftover hexagons and half-hexies. I'm seeing a couple of table-runners in my future!
All my columns are sewed; now it's time to press all those seams open. Ugh! Once that is done, I'll sew the columns together and the basic top will be done!
I'm off to Memphis for my grandson's 6th birthday (how did that happen?!?!). When I get back, just wait until you see the border fabric that I'll be using!
So, I got all those triangles cut and spend quite some time figuring out the best placement of each group to create a hexagon. Then I sewed them all together, 3 at a time, to create half-hexies.
First, sew 2 triangles together from each set of six. Make sure that you keep track of where the points are going to meet in the center of the hexagon (I did have to rip out a few seams...). Press the seams open (not to the side).
Then sew a 3rd triangle to each of the triangle pairs that you just made, again making sure that the center points meet and pressing the seams open.
This can all be done by chain-piecing. You just have to be careful to keep each hexagon in order! You'll end up with two half-hexies that you pin together.
At the second class, we all arranged our hexagons on a piece of batting, then started moving them around to find a layout that we liked. This was stressful for me, because I didn't think that my fabric pattern was working. But everyone in the class liked it! :-D And everyone in the class (well, except one person) hated their fabric, too. But guess what -- all of the quilt layouts looked WONDERFUL! Can you see the stars and swirls starting to form? People suggested different ways to arrange the hexagons, and everything started to come together.
I'm so disappointed that I didn't take pictures of the other projects -- they were so nice, and every one was completely different. I hope everyone brings their completed quilt tops back for show-and-tell, so I can share these beautiful creations.
Now to start putting everything together. Each hexagon is arranged so that there is a continuous seam line vertically (line them up so that there is a point at the top, not a flat side). In one row, the line is between hexagons; in the next, it's down the middle (that's why we didn't sew our hexagons together before we arranged them). I don't know if you can see this in this photo. I need to figure out how to add graphics to these photos -- little arrows and comments.
When I got all my hexies lined up again at home, I started sewing them into vertical "rows" (AKA columns). I ended up with 16 vertical strips and tons of leftover hexagons and half-hexies. I'm seeing a couple of table-runners in my future!
All my columns are sewed; now it's time to press all those seams open. Ugh! Once that is done, I'll sew the columns together and the basic top will be done!
I'm off to Memphis for my grandson's 6th birthday (how did that happen?!?!). When I get back, just wait until you see the border fabric that I'll be using!
Tuesday, August 28, 2012
Kaleidescope Adventure Begins!
I've just started a new class, One Block Wonders, at Pieceful Quilting. I missed the first class because I was traveling back from San Francisco, so I'm just winging it. First, though, catching up with the Barrister's Block...
Barrister's Block
Way behind -- I missed the entire month of August! So far I've caught up with the first 3 blocks.Handweave
This one came out great. No triangles (or, for me, tri-mangles). Not very sexy, but nice.Missouri Star
I love this block. I am a big fan of the Missouri Star Quilt Company and was delighted to make the block, even though the little duck wasn't there to quack. I love the dragonfly print in the center, which I picked up during the Shop Hop last month.Boxes and Baskets
What is it about the red/white/blue blocks that always get messed up? I think it's because I use muslin for the background. This block required some easing around the center unit and the background rectangles. Came out OK (sort of), but lots of wrinkles. If you could see this in 3-D, you'd know that it would make a great baseball cap. Nothing flat about it!Kaleidoscope Quilt
I couldn't wait to tackle The One Block Wonder. It's a kaleidoscope quilt. It's gorgeous and really not difficult (except that it's all triangles, and I still don't sew these very well). But I missed the first of the two classes, where they explained how to pick out fabric and cut it and arrange it.The Fabric
I couldn't find anything at my LQS (Pieceful Quilting) and (sigh) ended up at Jo-Ann. Found an autumn floral that I thought would work; now I'm not so sure. And since I was at Jo-Ann, I didn't get the advice I needed, so I ended up with not-quite-enough-fabric. I ordered another yard on line (even though they say NEVER to to that), and sure enough, that added to the problem. Upshot: I don't have as many triangles as I should have. But guess what -- I'll figure something out!
The book we are using in the class is One-Block Wonders by Maxine Rosenthal (C&T Publishing).
| This is the Bible! |
Cutting the Fabric
The biggest issue in the entire project (after selecting the fabric) is to line up the six wide strips to make sure that the pattern is "perfectly" aligned. (I HATE that word!) The idea is to cut six "perfectly aligned" triangles from each strip. After aligning the wide strips, cut 3-3/4" strips. Then use a 60-degree ruler to cut triangles from each of these smaller strips.
| Align the ruler to just remove the selvage. |
| Cut along the edge of the ruler (sorry about the flash glare!) |
Assembling the hexagons
For each set of six triangles, there are 3 ways to align them. Maybe there's a secret that I don't know, but I needed to try out all the options to decide how to construct each hexagon.
Here's one set. These three photos show all the possibiltiies from one cut:
| Option 1 |
| Option 2 |
| Option |
| Option 1 |
| Option 2 |
| Option 1 |
| Option 2 |
Sewing the Blocks
Next up is to sew things together. The trick is to sew 3 triangles from each group together, making two halves of a hexagon. In the next class we'll put the hexagon halves on a design wall to figure out how best to create a quilt. This is the part that I'm worried about -- I think the colors here are too similar. But it will be fun anyway.
Stay tuned to see what happens!
Tuesday, August 7, 2012
The Big Reveal!
So here's why I'm baking pies for my Dear Husband instead of sewing!
I've complained for a while that the computer desk I've been using as a sewing table just wasn't doing the job (though it seemed like a good idea at the time). So when my local quilt store had some floor models for sale, I jumped in. I emptied the files and other business-type stuff from the desk and then DH took over. He managed to get the desk apart and wrestle the pieces out of the "study" (now known as my sewing room!).
Then, bless his heart, he painted the room. It was a hideous salmon pink (nice color, but not on walls!). Now it is a restful blue/green/gray shade. Bear in mind that the temperatures have been in the 90's, humidity the same, and no A/C. What a guy! Plus, he grills for dinner!
For the moment, I'll use one corner as a cutting area. I was using the dining room table -- good exercise to wander back add forth, but not very convenient. Plus, I was always having to choose between quilting and entertaining.
I bought a mini-iron for those quick HST presses. Still need to get a good heat-resistant pad, though. My regular iron has an automatic shutoff -- I hope that this will be better for those stitch-and-press times.
I'll have to wait a bit longer for the template that fits in to surround the machine when it is in the flat position. But how nice to have it at a level where my arm is exactly even with the sewing surface. Good-bye, carpal tunnel pains! Now I can sew my brains out!
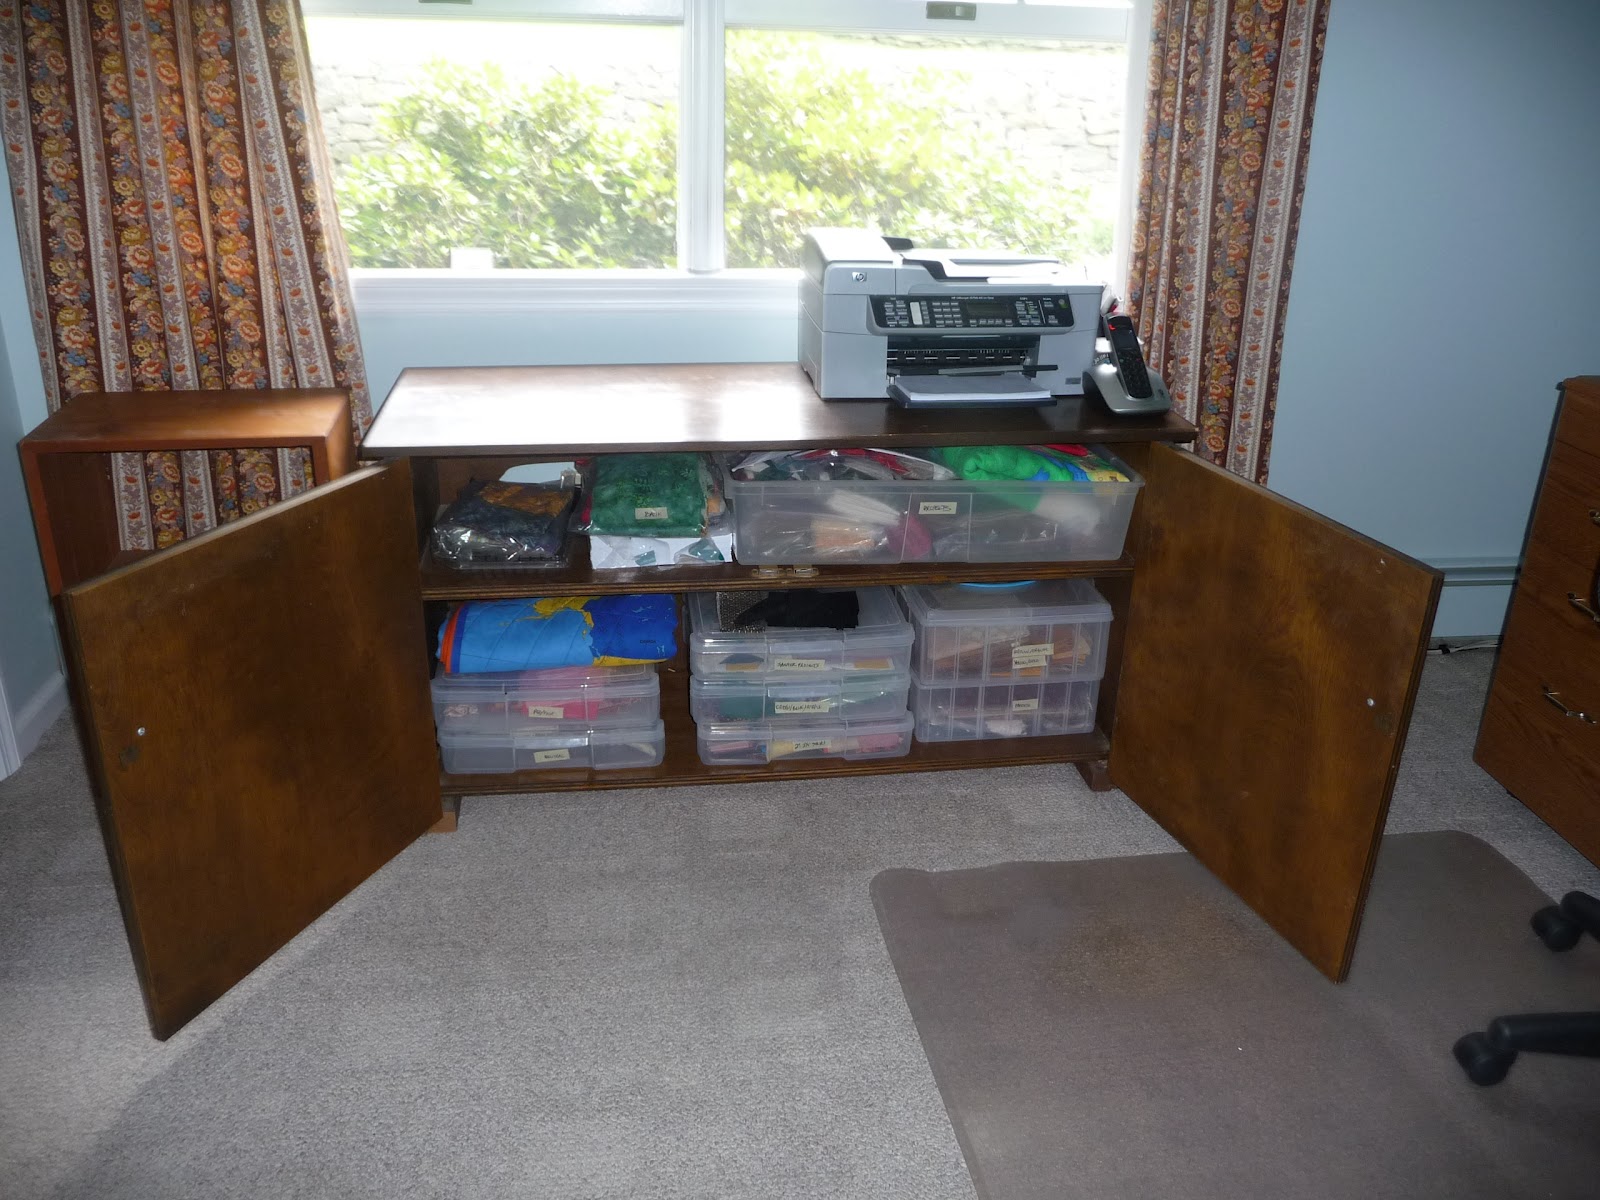
Meanwhile, I emptied out the old stereo cabinet as well (p.s., DH built that!). It used to house all my non-sewing needlework (needlepoint, knitting, crochet, embroidery, etc.). That's all in a new spot in some newly-emptied drawers, and my fabric stash that used to be in bins on the floor is now in the cabinet.

The one thing left over from when this was an office is the printer. The cable modem and router are tucked into the cabinet, so the printer needs to be nearby.

Each bin is labeled, fabric sorted by color and size. This system is sure to last at least 6 months, before (a) the stash gets too big, or (b) my organizational skills fail as usual. I'm hoping for (a) but I'm not taking any bets!
Meanwhile, please don't open the closet door! Batting, rulers, my mother's sewing baskets, miscellaneous tools and notions, fabrics that aren't 100% cotton, all flow out as if waiting for their turn to shine.
I'm off to California for a week, but I'm already itching to get back to my machine and sew! Lots of Barrister's Blocks await...
I've complained for a while that the computer desk I've been using as a sewing table just wasn't doing the job (though it seemed like a good idea at the time). So when my local quilt store had some floor models for sale, I jumped in. I emptied the files and other business-type stuff from the desk and then DH took over. He managed to get the desk apart and wrestle the pieces out of the "study" (now known as my sewing room!).
| Goodbye, salmon. Hello blue! |
Then, bless his heart, he painted the room. It was a hideous salmon pink (nice color, but not on walls!). Now it is a restful blue/green/gray shade. Bear in mind that the temperatures have been in the 90's, humidity the same, and no A/C. What a guy! Plus, he grills for dinner!
So here is the sewing cabinet, all closed up. Small, tidy, very nice. Much smaller than the computer desk that was there.
Voila! It opens up into a nice, efficient space. The machine is on a lift that can move up and down depending on one's needs. There is a drop-down table at the back that opens up to support a quilt or to use for cutting. This will be a huge help as I continue to work on my free-motion quilting.
For the moment, I'll use one corner as a cutting area. I was using the dining room table -- good exercise to wander back add forth, but not very convenient. Plus, I was always having to choose between quilting and entertaining.
I bought a mini-iron for those quick HST presses. Still need to get a good heat-resistant pad, though. My regular iron has an automatic shutoff -- I hope that this will be better for those stitch-and-press times.
I'll have to wait a bit longer for the template that fits in to surround the machine when it is in the flat position. But how nice to have it at a level where my arm is exactly even with the sewing surface. Good-bye, carpal tunnel pains! Now I can sew my brains out!
Meanwhile, I emptied out the old stereo cabinet as well (p.s., DH built that!). It used to house all my non-sewing needlework (needlepoint, knitting, crochet, embroidery, etc.). That's all in a new spot in some newly-emptied drawers, and my fabric stash that used to be in bins on the floor is now in the cabinet.
The one thing left over from when this was an office is the printer. The cable modem and router are tucked into the cabinet, so the printer needs to be nearby.
Each bin is labeled, fabric sorted by color and size. This system is sure to last at least 6 months, before (a) the stash gets too big, or (b) my organizational skills fail as usual. I'm hoping for (a) but I'm not taking any bets!
Meanwhile, please don't open the closet door! Batting, rulers, my mother's sewing baskets, miscellaneous tools and notions, fabrics that aren't 100% cotton, all flow out as if waiting for their turn to shine.
I'm off to California for a week, but I'm already itching to get back to my machine and sew! Lots of Barrister's Blocks await...
Monday, August 6, 2012
Pennsylvania Dutch Peach Pie!
This weekend was the beginning of a major quilting-related home-improvement project and my DH came through way beyond the call of duty (more on that later!). Since I couldn't (or he wouldn't allow me to) assist, I HAD to do something for him. Summer on Long Island is a food lover's paradise, so I decided to make him a wonderful dessert!
The original recipe for Pennsylvania Dutch Peach Pie came from a good friend when we lived in DeKalb, Illinois. The recipe was scrawled on a page torn from a steno pad (remember those?!). I hope you enjoy this as much as we did!
Ingredients
1 cup sugar
2 large eggs
1 tablespoon milk
2 tablespoons melted butter
1/2 teaspoon cinnamon
1/4 - 1/2 teaspoon nutmeg
3-4 cups peeled and sliced peaches (about 1-1/2 lb)
1 unbaked 9" pie crust
Slice 3-4 cups peaches (about 1-1/2 lb.). Blackberries are available at farm stands and pick-you-own places now, so I replaced one cup of peaches with one cup of blackberries.
The peaches are so ripe, they didn't need to be blanched; the skins just slipped off.
The original recipe calls for mixing the spices with the custard, but I prefer to add them to the fruit; they seem to be more evenly distributed. I like a lot of spice -- 1/2 teaspoons each cinnamon and nutmeg; you might want to cut back a bit.
Add two eggs to another bowl.
Whisk the eggs with 1 tablespoon milk and 2 tablespoons melted butter, then add one cup of sugar. This will be your custard.
Put the fruit in a prepared pie crust. I usually make my own, but this time I used a (thawed) frozen crust. Works for me (I rarely eat the crust), but the pan is smallish, so the custard overflowed. I like to line a cookie sheet with foil and put the pie plate on that -- definitely the way to go if you use a frozen crust in a wimpy aluminum pie plate!
Bake at 350 degrees for about 50 minutes. Cover the crust edge if necessary to allow the custard to set. Allow to cool.
Serve at room temperature or chilled. Refrigerate any leftover. Don't worry, it won't last long!
The original recipe for Pennsylvania Dutch Peach Pie came from a good friend when we lived in DeKalb, Illinois. The recipe was scrawled on a page torn from a steno pad (remember those?!). I hope you enjoy this as much as we did!
Pennsylvania Dutch Peach Pie Recipe
Ingredients
1 cup sugar
2 large eggs
1 tablespoon milk
2 tablespoons melted butter
1/2 teaspoon cinnamon
1/4 - 1/2 teaspoon nutmeg
3-4 cups peeled and sliced peaches (about 1-1/2 lb)
1 unbaked 9" pie crust
Slice 3-4 cups peaches (about 1-1/2 lb.). Blackberries are available at farm stands and pick-you-own places now, so I replaced one cup of peaches with one cup of blackberries.
| Local peaches and blackberries -- yum! |
The original recipe calls for mixing the spices with the custard, but I prefer to add them to the fruit; they seem to be more evenly distributed. I like a lot of spice -- 1/2 teaspoons each cinnamon and nutmeg; you might want to cut back a bit.
Add two eggs to another bowl.
Whisk the eggs with 1 tablespoon milk and 2 tablespoons melted butter, then add one cup of sugar. This will be your custard.
Put the fruit in a prepared pie crust. I usually make my own, but this time I used a (thawed) frozen crust. Works for me (I rarely eat the crust), but the pan is smallish, so the custard overflowed. I like to line a cookie sheet with foil and put the pie plate on that -- definitely the way to go if you use a frozen crust in a wimpy aluminum pie plate!
| Fruit added to the prepared crust |
| Custard added (and overflowing!) |
Serve at room temperature or chilled. Refrigerate any leftover. Don't worry, it won't last long!
Subscribe to:
Posts (Atom)