Monday, February 13, 2012

The Charming Baby Quilt is Finished!

And a new record is set -- the baby quilt is quilted and bound well in advance of the baby's arrival!


 I love the dark chocolate-brown border and the bright orange binding!  I'm just not a pastel person.  This is the first quilt that I've assembled without pre-washing the fabric.  I like the way washing and drying kind of hide most of the, uh, imperfect stitching.  And the parts that aren't hidden?  Well, that's how you know that it's hand made!  So, here's how it was finished...

How to Quilt?

Ditch stitching (quilt back)
I decided to challenge myself while doing the quilting here.  After the quilt was basted, I stitched-in-the-ditch around the blocks to secure everything and to make "frames" for the flower motif that I wanted to try.  To tell the truth, I find stitching in the ditch (sewing along the seam lines) to be difficult to do well.  Many quilters recommend stitching parallel lines 1/4" on either side of the seam, but I wasn't sure I wanted that effect around the flower in each block.  Since the colors in the quilt top range from dark brown to cream, it was inevitable that some my pale-blue stitches would show up.  Oh, well. 

I couldn't find exactly the flower that I wanted in my software or on my bookshelf, so I adapted the one I liked the best, adding a circle in the center of overlapping petals.  Since the motif has simple curves and stopping/turning points, I thought it was a good candidate to again attempt free-motion stitching.  The practice squares went pretty well, but when I started in the middle of the Real Quilt, it didn't look so hot.  But I really wanted the flowers!  I figured I could tackle this with my walking foot -- after stitching 1 or 2 stitches at a time on that map-of-the-U.S. quilt, this should definitely be doable.

Marking the Quilt

Having decided on the motif and the walking foot, I next had to figure out how to get the motif onto the quilt.  I tried making my own stencil and marking the quilt with a  marking pencil, but (a) making the stencil was a pain and (b) I couldn't see the lines anyway, even if I marked the back instead of the top.  Same with chalk.

Stitching over the motif with my walking foot.
After investigating several options, I sent away for something called Golden Threads Quilting Paper.   It worked out fine.  There are cheaper options, but I have enough challenges as a new quilter; better to use good quality stuff and to focus on my sewing.  The paper is smooth and easy to mark, sew through and tear away.  (It would have been even easier if I used a smaller stitch, but after that ripping-out nightmare a few weeks ago, I was so not going there!).

Quilting the Blocks

I cut 24 squares of paper a little larger than each block.  I marked each square with a fine-point permanent marker.  I used a permanent marker just in case a little piece got left behind -- I didn't want any ink staining the fabric when the quilt was washed.  I also wanted a line a little wider than, say, a pen, so that I could easily see where I'd already stitched and not get lost.   Working one block at a time, I pinned the motif to the quilt and started stitching at the center circle.  I kept the machine's speed regulator at about half speed, which let me sew the curves smoothly (usually) with the walking foot.
The paper is so smooth; quilting gloves make the job easier, even though not doing free-motion.

Removing the quilting paper -- ta da!

The flower motif on the quilt back.

More Lessons Learned

 If the "rule" applies, follow it.  If it doesn't, do what works.

When I first started sewing the flowers in the blocks, I started in the center of the quilt -- that's what "they" say to do.  But I had trouble turning the quilt without tearing the paper.  Then, DUH!  Since I'd already stitched around all the blocks, I could start the flower quilting wherever I wanted to without much worrying about things shifting.  So, as you can see in the photos above, I started in a corner.  Of course, then I ended up having to shove the entire quilt under the machine arm at some point.  But the actual sewing was much easier, a real confidence-builder.  After quilting around the edges, I'd gained experience working with the paper and the center went much more smoothly.


Just shove it.
There are all kinds of things you can buy to help you roll, fold or pleat the part of the quilt that's not being quilted.  I found that it's easier for me to just shove the rest of the quilt to the back, at least for a crib-sized or lap quilt.  Interestingly, I just found a video on the web where the expert quilter says to do the same thing.  Hooray for the web!  You can always find someone who says what you want them to say!

A tool discovered

When I signed up for something, I forget what, they sent a free gift, That Purple Thang.  It's a little plastic doohicky that looked to me to be totally unnecessary (no wonder it was free!).  After all, I keep 3 chopsticks at hand at all times -- Chinese, Japanese and Korean.  You can poke anything with those puppies.  Well, it turns out that That Purple Thang is actually pretty cool.  One end is slightly curved (unlike a chopstick!), so you can get it under things to lift them up.  And unlike a seam ripper you don't risk damaging the fabric in the process.  It's wonderful for pulling your bobbin thread to the top of the quilt.  I used it lift up the paper patterns after quilting; it's great for scratching off the tiny pieces that didn't tear cleanly.  It has a little 1/4" square at the other end for quick accuracy assessment.  It's available in many stores and websites.  It's not expensive, but the price varies quite a bit, so shop around.


Quick Note:

A couple of people have mentioned that some of the photos in my earlier posts were hard to see.  I've now gone back and enlarged some of them, so you might want to re-visit the posts and let me know if this is an improvement. 

Tuesday, February 7, 2012

Toy Boxes

My First Patchwork Quilt

When I first got interested in learning to quilt, my favorite local quilt shop didn't have any Quilting 101 classes available.  So I purchased a learn-to-quilt video and went to work.  The beginner's quilt that you make in the video classes is a simple 9-patch, about the size of a crib quilt.  I decided that I wanted to make something that could actually be used, so I picked fabrics in primary colors for a quilt for a new baby.

The finished quilt.
The blocks are just alternating patches in two colors.  When the blocks were finished, I turned them around to form a lattice pattern on the quilt top.  I made 3 borders.  The inner border was the same blue print in the quilt with cornerstones in the yellow fabric.  The second border was bright red with mitered corners.  The 3rd border was a wonderful "crayon scribble" fabric designed by Eric Carle (he of Very Hungry Caterpillar fame), also mitered.

The video suggested quilting by stitching in the ditch for this beginner's project, but I had a feeling that wouldn't work too well.  My blocks weren't all that square, so the seams kind of wandered around the quilt top.  I thought that doing a cross-cross grid would be easier and might take the eye off the "unsquaredness".  The lovely Colleen at Pieceful Quilting had the wonderful idea of using a variegated thread in primary colors.  It really looked good.  And the crisscross quilting actually helped ease some of the blocks into better squares (although as you can see, not PERFECT squares).

Quilting with a variegated thread.

I liked how the quilt looked as it was, so I made the binding in the same fabric as the outer border.


The back of the quilt is another Eric Carle print -- don't you love it?!

I called this quilt "Toy Boxes" because the print fabric in the quilt top is toys, the blocks are "boxes" (squares) and the quilting is also boxes.   I'm not sure how much a baby in Miami needed a quilt, but it was fun to make.  My first real quilt!


Monday, January 30, 2012

Two "New" Techniques

I just can't get to my quilting until I clean up my work space -- what a disaster!  Since my sewing room is also my study, it's piled with papers that need to be sorted and filed, 3 years worth of dog-eared Gourmet, Bon Appetit, Cooking Light and Fine Cooking magazines, a pile of Planning Board agendas and books that I saved to use in my non-existent consulting career.  So I have some serious re-organization work to do.

Meanwhile, I thought I'd share two really neat quilting techniques that appeared in my mailbox over the last couple of days.  Neither one is new -- you can certainly find them if you poke around on the web.  But they are so interesting!  Enjoy!

Tube Quilting

In this video you see how to sew strips of fabric into a tube, then slice them up into triangles to make several kinds of interesting patches.  So easy!

No Sewing Until You Quilt It

I've never seen anything quite like this.  It's a method for joining pieces of fabric in any shapes you want using a fusible interfacing called French Fuse, which you can find on a number of quilt-related websites.  The technique was developed by Ann Holmes.  It's kind of like landscape quilting, except that you don't have to cut little squares and triangles -- just go free-form to get the effects you want.  My next project (AFTER I quilt Q-911 and the baby quilt) is going to be a quilt that copies a photograph, not really a landscape, but using the same techniques.  But now I'm really curious about this method -- I even ordered the DVD today.

You also might want to check out the page on Leah Day's website where she posted this video to see more about the goddess art quilts that she has been making for several years.

Friday, January 27, 2012

A Charming Baby Quilt (Part 2)

The border is done, the batting and backing basted, and I'm all ready to quilt the new baby quilt.  That was fast!

Designing the border

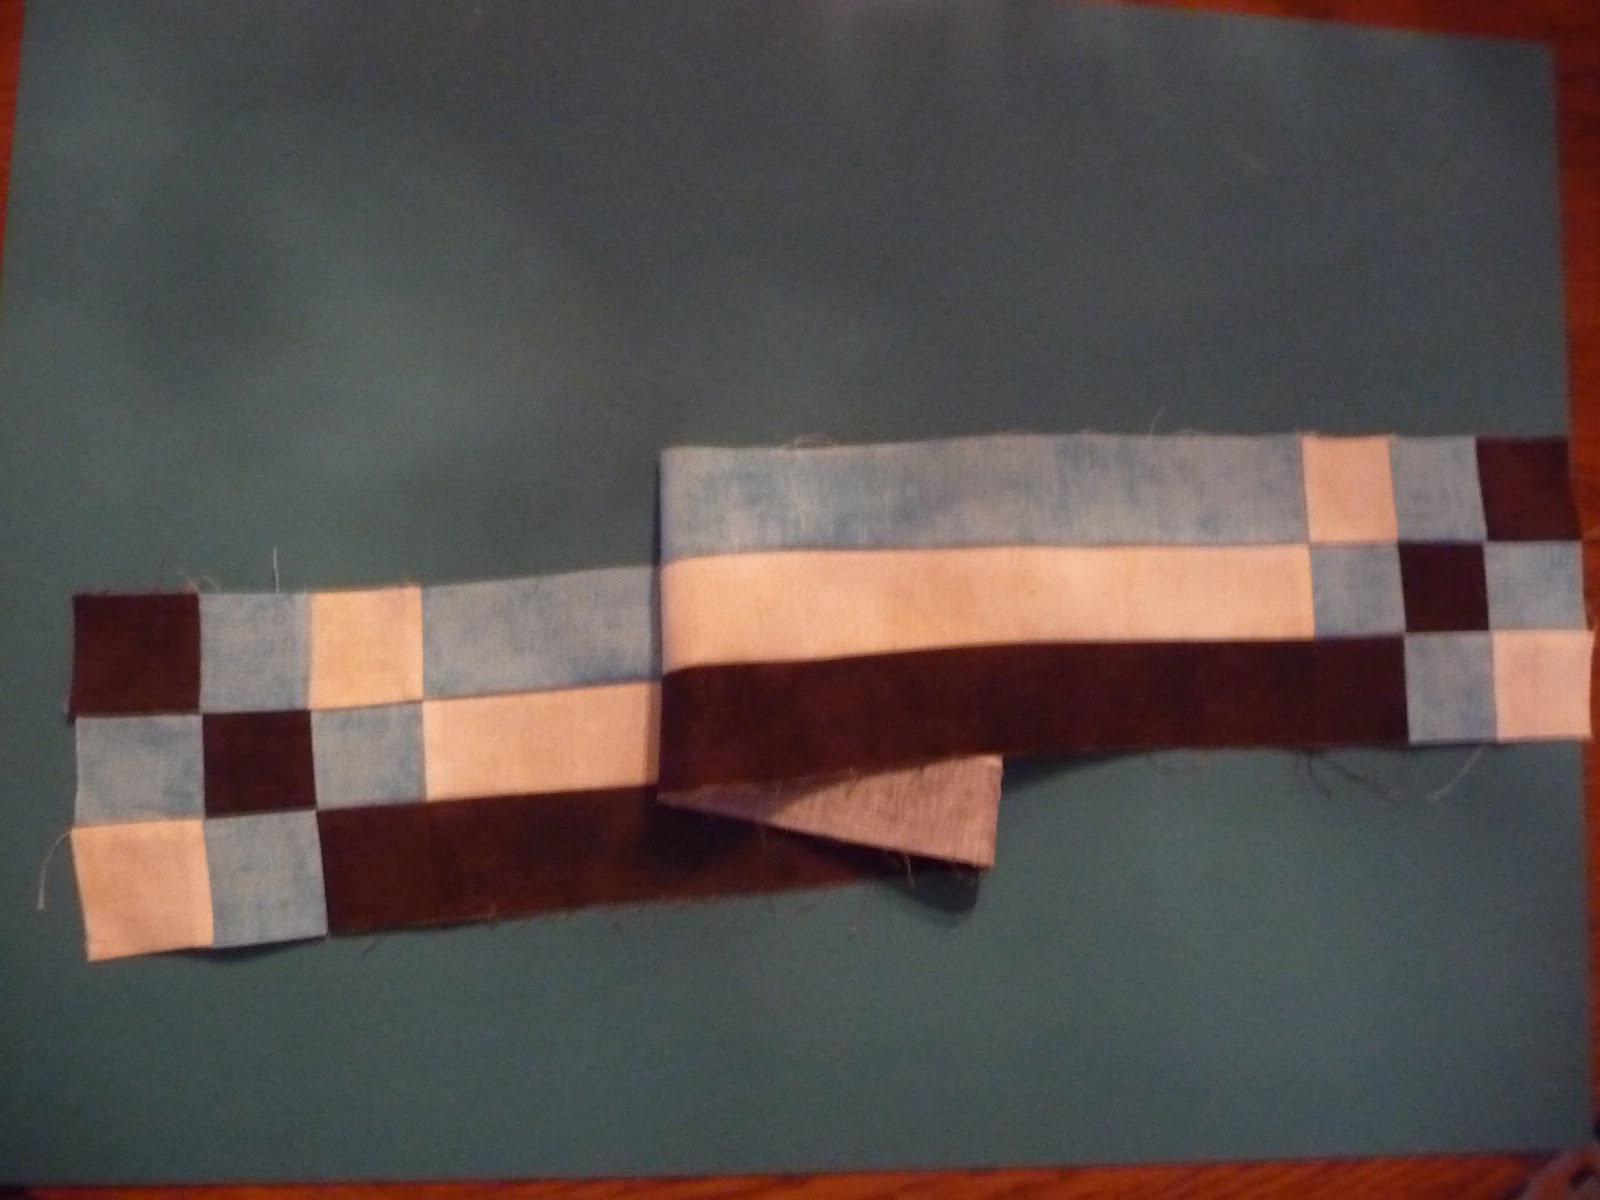
I decided to buy more of the solid colors that came with the charm packs, since the quilt is so busy, and to make a striped border with a 9-patch in each corner.  My new software, Quilt-Pro for Mac, was helpful.  Because my sewing still isn't all that accurate, the quilt top was a little undersized after I squared it up.  But I just plugged the measurements into the program and then made small adjustments in the border width until I had a border that allowed me to cut nice, handy 2" strips (less likely to accidentally cut on the wrong line).


Sewing the border

Since I talked about chain-stitching in the last post, I figured I'd take the opportunity to get some pictures of the process while  I pieced the border:
Note the slight space as I move from one strip to the next.

You can just barely see the chains of stitches connecting the strips.

The nine-patches are almost done.  Rather than making a 9-patch block for each corner, I sewed the squares to the shorter strips, then just sewed the strips together to make a single wide  strip for the horizontal borders.  Voila!
I pressed the seams in each individual strip in one direction, alternating between strips.  This allowed the seams to nest nicely when I sewed the strips together.


I added the side borders first.

The horizontal borders with the 9-patch cornerstones.


I put the brown as the inside border strip to frame the rest of the quilt.  Using Quilt-Pro, I tried it out in the middle and outer locations, but I liked the inside better.  And I swapped out the locations of some of the squares in the nine-patch so that the brown squares would step down evenly.


See how nicely the seams come together?  This is the best quilting trick I've learned.


The binding is all pieced, too.  Now for the quilting, which readers of this blog know is my Achilles heel.  Wish me luck!

Tuesday, January 24, 2012

A Charming Baby Quilt (Part 1)


The infamous "Q-911" quilt is on hold while I wait for some stabilizer to arrive.  I decided it was the best bet for getting the text quilted into the sashing.  But fortunately, I just received some fabric that I'd ordered to finish the borders of a new baby quilt.

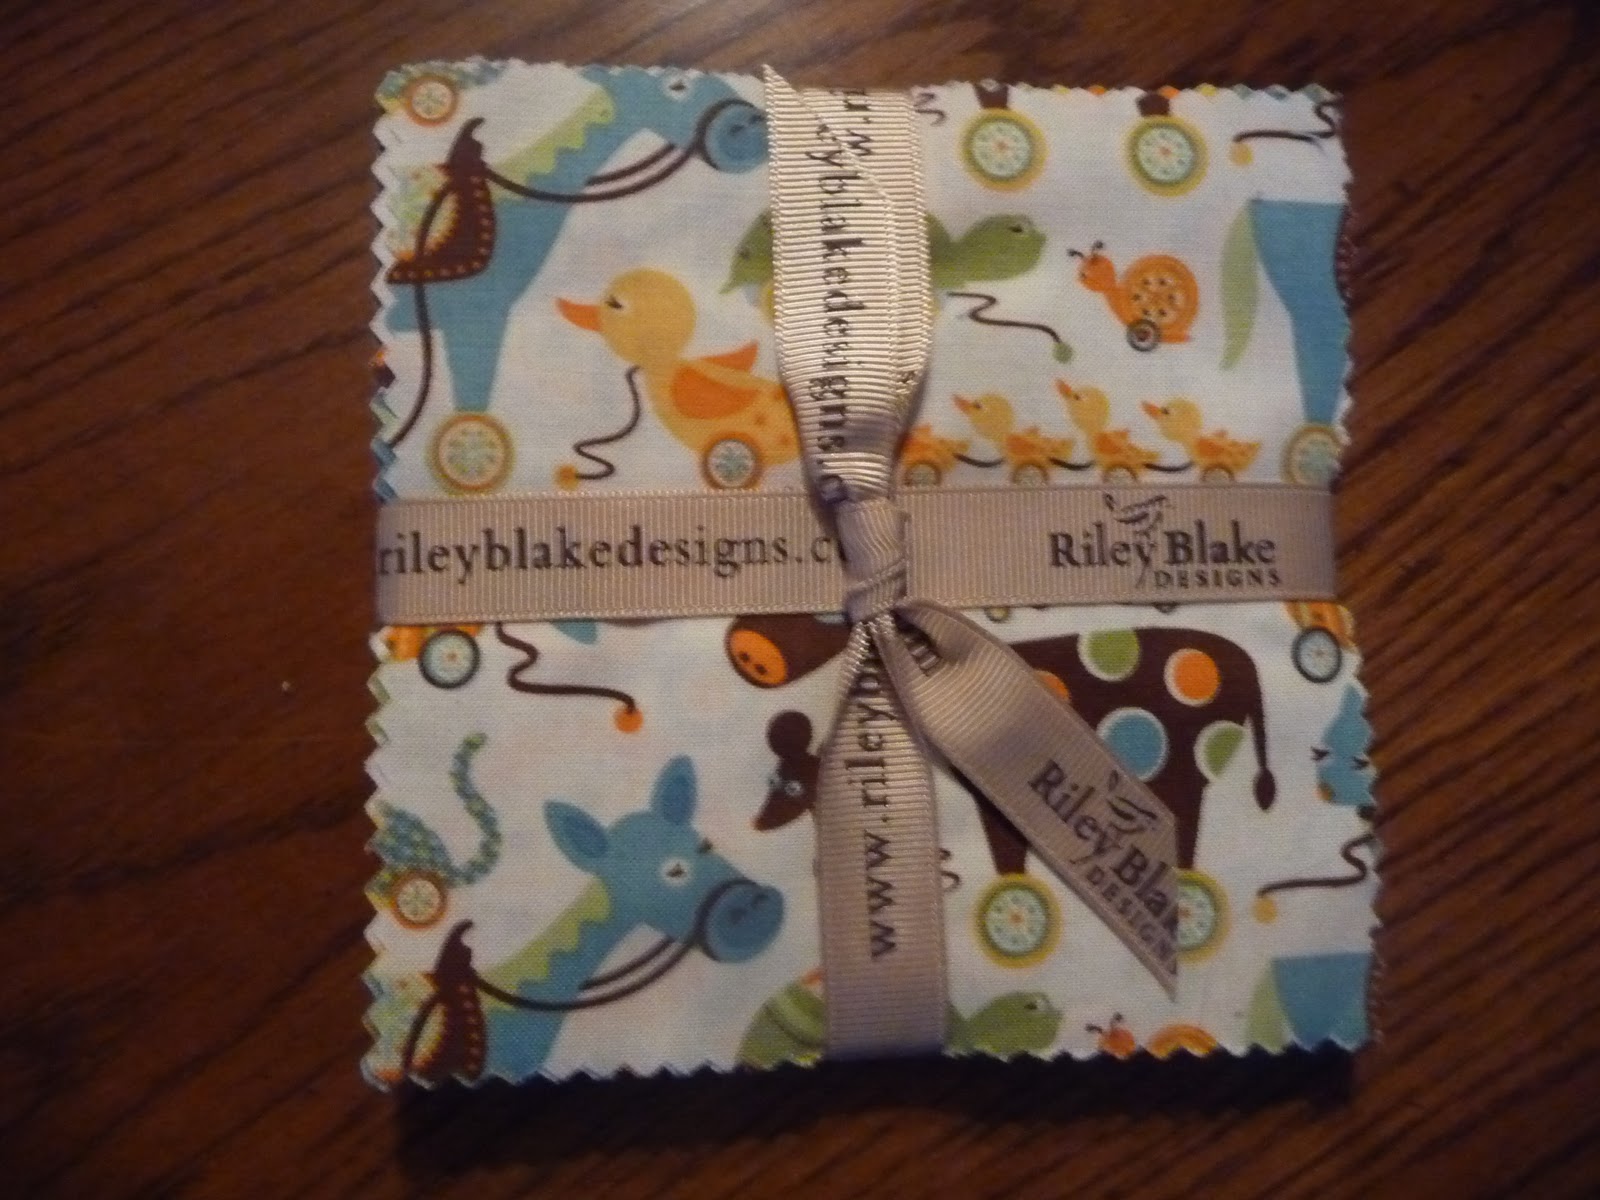
A few months ago I got a package of pre-cut 5" squares (often called "charm packs") of unusual baby fabrics -- one of those Daily Deals where the shipping ends up costing more than the fabric.  It had 8 fabrics in 3 colorways (pale blue, green and off-white) with 2 shades of orange and chocolate brown in most of the prints.  I loved the idea of using pre-cut fabric, which I had never done.

It was a small pack -- only 21 5" squares -- so I was fishing around for how to use them.  Then I ran across this fun and easy idea on a website called Nancy's Fabrics.   Nancy's directions are much less complicated than mine, but she's really talking about how to use the fabric and doesn't get into the details of sewing. 

Make the 9-patches

I didn't use the solids on the right
1.  Arrange the squares into 9-patches (3 across, 3 down) in whatever order you want and stitch them together to form a patch. In my case I'd only get 2 patches, so I bought two more packs (not Daily Deals!).  This gave me six 3x3 patches with 9 squares left over.  I used the all printed fabrics and set aside the solids.  I tried to arrange the fabrics so that no patterns or colorways were adjoining.

2.  Start sewing!  I chain-sewed the patches, but I only used the fabric from one package at a time, so I wouldn't get lost.

The first two columns are sewn.
Keeping the squares in the order you've chosen, first sew pairs of squares, right sides together together without stopping to cut the thread between pairs.  I sewed the first 3 squares for the second patch in the same strip, so I had two strips of 6 squares each.  Without cutting apart the squares you've already sewn, sew the remaining squares onto the open edge of the second strip.

.
Squares from one pack stitched together.
Now cut the threads so you have 2 patches of 9 squares, each 3x3.  Leave the rest of the threads uncut.


 3.  I am a great believer in pressing.  Lots of quilters just finger-press along the way, but I find that pressing with an iron really helps make the sewing more accurate -- more on this later -- and you can spot anything that needs fixing before it become impossible to correct!  Press the seams in the first row of your patch to one side.  Press the seams in the next row to the other side.  Press the last row the same as the first.  OR press the seams in the first row toward the middle, the second row to the outside, and the last row same as the first.  Your goal is to have the seams going in opposite directions for when you sew the rows together.  This sounds complicated, but really, it's not!  And it's worth the extra effort.

Seams pressed in opposite directions.

One 9-patch sewn.
4.  Stitch the rows.  For each patch, fold the top row down over the middle row, right sides together, matching the seams. This is where your pressing pays off.  The already-sewn seams will be going in opposite directions, so they will just lie right down and nestle into each other.  Feel where the seams meet when they aren't aligned, then check them visually and feel again.  You can notice how flat they feel.   Got it?  Sew the horizontal seam.  In the same way, fold the bottom row up over the middle row and sew. 


Make and sew your blocks

 1.  After you've made your 9-patch squares, get out your mat and rotary cutter and cut each patch into quarters.  As you can see, each smaller block has one full-size (5") square, one quarter-square, and two rectangles.  I got two 3-patches out of each package of fabric, so I ended up with 24 blocks.
9-patch cut into four blocks

2..  Now, after squaring up your blocks, re-arrange them to create your quilt.  The directions on Nancy's website suggest several possible arrangements, but I decided to go with just a plain 2:3 rectangle with no sashing between the blocks.  I started playing around with the blocks, sticking with my two original criteria (no adjoining patterns or colorways).

I was pretty happy with the way most of the seams in the patches matched up, and I knew that with all the different patterns rolling around the quilt top, the final seams probably wouldn't be all that noticeable.  But I still wanted them to match as well as possible.  Then it hit me!  I added another requirement to my layout:  no seam matching between blocks! 

No seam-matching required!
This was actually pretty easy.  I'd already laid everything out by color and pattern, so I just started turning each block so that no seams had to match in any direction.  I had to swap a couple of blocks to keep the patterns and colors distributed, but it worked.

3.  Sew your blocks together using the same chain-sewing technique that you used to make your 3-patches.  When you sew your long seams (columns), you won't have to match a single seam.  And when you sew your rows, you only have to match the 3 vertical seams that you just sewed.  And of course, you remembered to press them first, in opposite directions, so your seams will be lovely.

Pre-cut, but not pre-accurate.
One thing I learned in this project was that the pre-cut squares aren't necessarily cut any more accurately than I could have done myself.  Yes, they were exactly 5".  But check out the brown checked fabric on the left.  As you can see, the cut edge on the bottom isn't cut straight across the line of the checks.

Also, beware mixing pre-cuts from different manufacturers.  These were all the same, but the sizes of the squares may differ, even just a little, between manufacturers.  That's OK, as long as you know it and account for the differences.

That's it for today.  Time to get the border fabrics cut and sewn.  I'll be back with Part 2 in a few days.


Monday, January 23, 2012

Free-Motion Tools

Yesterday I said that I'd provide some details on some free-motion tools that I've been using.  So here we go.  All three can be purchased as a set through Leah Day's website, but they are also available in quilt stores and on other websites as well.  Just head out to your favorite shop or type them into your search engine and get what you need.  Bear in mind that my difficult previous experience could have been a lot worse without these.

Machingers

These gloves are worth every penny.  They let you easily move your quilt around without pressure on the fabric to move it.  I find the movements more fluid and even with this tool.  To be honest, I lost my original Machingers at a class and got a substitute at Jo-Ann Fabrics.  The substitute works fine, but maybe like Dumbo's feather, I like the Machingers the best. Of the three tools, I find these the most indispensable.


Supreme Slider

My machine came with an extension table that gives me a reasonably large surface when I'm quilting.  But the Supreme Slider does add ease of movement.  As a novice quilter, I can't testify about how much better the quilting flow is with this tool, but it does seem to be better than without it.  The basic one covers most of my sewing surface area; there is a larger size, too.


Magic Genie Bobbin Washers

I don't honestly know how much help these are.  I've read that a vertical, rather than horizontal, thread spool provides the most even thread feed.  My machine has a horizontal spool.  And I did get that awful thread next the other day (gak!).  But these are inexpensive, and many experienced quilters recommend them.  As a new quilter, I still have lot of ancient spools of thread (some are still wood spools!).  So if these washers will help to make old thread usable, I'm in.

Sunday, January 22, 2012

Call Q-911!

Quilt emergency!

After days of practice, I decided that Friday was the day to finally try my free-motion "skills" (?!) by stippling on a real quilt.  What a disaster!  Everything I've come across (web, books, videos, classes) says to practice like crazy on a small (12" - 24") faux quilt sandwich.  But that didn't prepare me for how the weight of a quilt, albeit a small (lap-size) one, would resist moving.  Even with my Magic Genie bobbin washer, Supreme Slider and Machingers,* I ended up with tiny stitches and total lack of control over where my stitching was going.  I am so NOT going to show a photo of this!

Quilt back; knot was in the brown area

The attempt ended when I a got a huge knot of bobbin thread on the bottom of the quilt.  I was in the process of deciding that I could live with the imperfect stitching until this happened.  The back is pieced, mostly a light-colored fabric, and I was quilting with light thread, but of course the thread mess happened right in the middle of a dark strip on the back.  No choice but to get out the ripper.
I was so upset about this that I dreamed about it that night.  But at least my subconscious brain figured out what I'd done wrong.  I plan to incorporate some cursive text in the stitching on the horizontal sashes.  So I started stippling on the vertical sashes to avoid tackling the text for the time being, and failed to begin in the middle of the quilt (where the text would be).  I knew better -- everyone says to start in the middle.  But I guess my enthusiasm overpowered my common sense.  So, my [very] bad on that.  Never again!  Measure twice, cut once.  Think twice, stitch once!

My darning/free-motion foot
All the free-motion how-to's say to start with quilting using light thread on light fabric (all the better to not see it).  The trouble is, I couldn't see what I was doing or where I'd been.  Even where I tried drawing on the fabric, I just couldn't figure it out.  I'm thinking that maybe part of the problem is my free-motion foot.  It's wide and plastic, not like the small metal circles on many machines.  But whatever, it's what I have, so what to do?

Taking it to heart

The stippling I think I can now handle.  Not great, but acceptable.  I plan to transfer the text or guidelines to the sashing in some way.  The intersections are a bit of a challenge, though.  I've decided to put a heart where the stippling in the vertical sashing meets the text in the horizontal sashing.  The heart shape is wonderful for neatly ending a line of stitching that's not on an edge, since it has two closing points (top center and bottom point).  It's also perfect for incorporating changes in direction (like the sashing intersection).  And they are easy for the beginning quilter -- you don't have to retrace any lines.

Heart Strings
These two photos (sorry they're so dark) illustrate the many ways that hearts can connect with other curvy lines.  They are from 501 Quilting Motifs (from the editors of Quiltmaker magazine, Martingale & Company, 2011).
Hearts Around


 I marked hearts on a practice square, but I couldn't see what I was doing.  The "hearts" ended up as some really weird, skewed shapes.  What I've figured out is to define a square where the heart will go (such as the sashing intersections), mark the vertical point where the heart will center (about 1/3 of the way down the square) and the vertical point where the curve of the heart changes (about halfway down).  Then free-motion away.


I tried all this on the other vertical sash, and it seems OK.  You may be able barely to see the original basting in this photo.  If I could have left it in, there wouldn't be all that marking to do.  But of course, quilting over the basting stitches wouldn't be too bright.

Unfortunately, since the stippling was more open (a.k.a. successful) on the second try, I had to go back and rip out everything else that I did on Friday.  Just as well, but some of the stitches are so tiny, I had to use a needle (not a ripper or even a pin) to get them out. Several hours' work, but quite an impressive learning experience!  I promise I'll post the finished product.  Really, I will!

* I show you these in my next post.