Sunday, October 29, 2017

Rail Fence Checkers

LEADERS AND ENDERS

I'm not a big fan of the rail fence pattern.  It's just not my style.  But when Bonnie Hunter came up with the added checkerboard units, I decided to make it.

I was getting ready to head to Otsego Lake for 10 days of solo time, so I bagged up the pieces for the fireplace quilt and kitted up what I needed to get a good start on the rail fence.

For the checkerboards, I have plenty of solid black, and both solid and tone-on-tone white fabrics.  i started strip-piecing them and already have a nice bag full of 4-patches.  Each block will require three 4-patches.


For the rails, I emptied my bins of 1-1/2" and 2" strips and squares and started in.  This would be my first totally scrappy quilt, but I did want at least to have some balance among light, medium and dark fabrics, plus a variety of colors.  I cut 6-1/2" lengths of pretty much everything I had in those widths (trimming the 2" strips to 1-1/2"), then dug into the color-sorted stash bins.

Being an OCD-type, I didn't want to waste a thing.  So I had 5 piles going:  strips 1-1/2" x 6-1/2" for the rails; squares of various sizes from strips less than 6-1/2";  selveges for a future project; dog bed filler (pieces narrower than 1-1/2"); and shreds-and-threads that actually had to go into the trash.  Note, that is the smallest pile!

Piles piling up!  (Please overlook the leftover lunch plate). Pieces for the dog-bed bin and shreds on the left.

Fence rails

Squares (5", 2", 1-1/2") and selveges
I sorted the rail strips into color families and took a photo of each group.  Then I made a copy of each photo and converted it into gray-scale to determine whether a fabric was light, medium, or dark.  Some fabrics surprised me, not what I thought they would be.


This is the teal family.  They look mostly pretty much the same to me; the 3rd and 4th from the left in the bottom row are certainly darks, but the others...?


But looking at them in gray-scale, the differences do show up.

I think the dark area on the left is just the hole in the sewing table where the machine goes.  My machine was getting its well-baby checkup when I took these pics.

Do you know that they sell special red glasses for quilters that enable you to see your fabrics in gray scale?  I'm sure there was a reason for them back in the day.  But almost everyone has a cell phone now with a camera.


Since I was sewing these on three different machines, I measured them again before I sewed a light/medium pair to a dark/medium pair.

I've made a couple of blocks but I'm still not sure I like this.  Bonnie Hunter says that "if it's still ugly, you didn't cut it small enough."  Well, these strips aren't all that small, I deliberately did not try to pair up strips according to color, and I was using up a lot of fabrics that I didn't like in the first place.  Oh, well, it's all just for fun.  And who knows what it will look like when it's done?  (You will, dear readers.  But it will be a while).

Have a happy Halloween!

Tuesday, September 26, 2017

Happy National Sewing Month!

Happy September (and goodbye, summer)  ðŸ˜”    Did you know that September is was National Sewing Month?  (Well, I started this post on September 1.  Now the month has flown.)  So let's catch up!


As I mentioned in my last post, I've been finishing up the blocks for the Otsego quilts (original post here).  The blocks are *DONE* but somehow I mis-counted something, and with the blocks that I have, the quilts will be just a bit too short.  I don't have enough fabric to make one more row on each quilt.

So while I ponder the fix, I decided to move on to another UFO, the fireplace quilt, and to dive into Bonnie Hunters's new Leader and Ender Challenge, a rail fence quilt.  More on that one in the next post.

THE FIREPLACE QUILT - Heading into the finish

Last November I made a New Year's Resolution to finish the fireplace quilt by Christmas, 2017.  This was the mosaic quilt that I'd "designed" by uploading a photo to the Victoria and Albert Museum website,  which broke down the image into squares and HSTs.  So this is how it started:

The original image:


The image as a quilt pattern:


Cutting instructions: 


You may remember, I was so excited about this quilt, but ran into a BIG problem of my own making.  I'd tried to save some time, effort, and fabric by making HSTs from already-cut squares.  Of course, the HSTs were too small (duh, I knew better).

Earlier this year,  I had laid out all the pieces and bundled them up by rows.


So now, as I hit the reset button,  all the HSTs still needed to be trimmed and all the squares had to be cut down to the size of the HSTs (1-3/4 inches).  Fun! (not).  I accomplished this while I was on personal retreat at the cabin in Michigan.  Then I finally started to sew.  The the seams needed to be about 1/8" to achieve the size that I had planned.  That has meant seams coming apart and corners of HSTs getting chewed up.

Nevertheless, she persisted.  I've gotten all the rows sewn together and am now embarking on finishing up the quilt top.  It's slow going --  it's hard to get the seams to nest, especially since they were sewed on 3 different machines.  When the top is together, I'll iron it onto interfacing with 2" squares that I'd originally expected to use.  I'm hoping that will minimize additional fraying and stabilize the quilt.

Current status:


The rows lined up and ready!  I expect that the quilting will help to define the main parts of the image -- flames, logs, etc.  I'm still looking forward to the finished product!


Next time I'll show you the Leaders and Enders project.  Until then...


Monday, August 7, 2017

Little Ones (people and quilts)

Little Ones (people and quilts)


It's hard to believe that summer is already winding down!

The Left Coast contingent arrived in early June and are now preparing to head back west.  I guess it will be nice to be back in our own bedroom and to have more space where the toys have been.  But truly, it has been an amazing and wonderful couple of months that I wouldn't trade for anything.  To those of you who have family nearby, count your blessings.  Mine are so far away, we rarely get more than a few days every couple of months with them.  Three-year-old Greta is a gem, so sweet and full of fun.  And to see baby June grow from a bobble-headed 2-month old to a feisty 4-month old who is full of smiles and gurgles and who can roll over and wants to learn to crawl -- such a blessing! 


  My Memphis grandsons started school today, though here in New York it will be another month.  They were here for just a week, but they were HERE!  (refused to allow photos, though).

Of course, with all that's been going on, I haven't had a lot of time to sew at home.  The precious three hours each week at the local quilt shop with our little quilty group have been my little piece of sewing heaven.  Still, much has been accomplished.

Progress on UFOs


The quilt top is done for a sampler block-of-the-month project that I started about 5 years ago.  It still needs to be quilted.  I'll share the finish when it's done.


The 160 blocks for the Otsego quilts (two twin-size quilts), in process for several years, are finally done!  Yahoo!  I had to order more of all but two of the fabrics.  Nonetheless, I realized that I am one row short for each quilt.  And I don't have enough fabric to make two more rows.  ARGGH!  


So near and yet so far.  I'm still trying to figure out how to make this work.  I *really* wanted to get these done this summer.  But I guess one more year won't be tragic.  


Table-top Mini Quilts


Meanwhile, two more mini-quilts made it onto the 12" hanging rack in the front hall.  For July, I just cut a panel from some patriotic fabric and framed it in red, white and blue with a gold binding.  Uninspired, but sometimes you make do.  I plan to replace it with something more interesting next year.


Much more fun was a very small quilt (9" x 12") that is almost like being on the beach.  I was inspired by a similar quilt that I saw on the web, although it was a wall hanging, about 24" x 36".  I changed the color palette a bit and used some clouds-on-blue for the sky, quilting around some of the whitest areas of the clouds.  The quilt looks wobbly in the photos -- I don't normally wash these little quilts, but this one needed a bath before it was fit to be shown!


For the water and sand I just did slightly wavy lines, but I did a little free-motion bubble shapes for the foam along the beach.  It came out sort of uneven, but considering that the widest point is only one inch, I didn't stress too much about it.


I had to satin-stitch around the sun, which I really don't like very much.  But it was ravelling around the edges.

The sun's rays are in a gold polyester thread with a lot of shine, using a built-in serpentine stitch in various stitch lengths.  This was the way the rays were done on the quilt I'd seen on the web.  I may go back and add some stitching around the rest of the sun, though not so dense.  The jellyfish thing doesn't really do it for me.  The reflection on the water is the same gold thread, just vaguely wavy lines.


For the border I used a lovely striped summer fabric that I'd bought to make pillow covers.  It turned out to be not quite right for that project, but it was perfect for the binding and one width of the fabric was just the right size.  Now to figure out what to do with the remainder of the two yards.


While I am sad that my summer of grandchildren is nearly gone, I am looking forward to spending more time on sewing projects old and new.   There are still a couple of UFOs that I really want to finish, and so many new quilts to make!  There are 2,715 items in the "Quilt Patterns" folder on my computer, and that doesn't count all the books and magazines on the shelf.  If I could put time in a bottle...


Wednesday, July 26, 2017

A Lovely Old Girl


I grew up sewing on my mother's (formerly my grandma's) White machine, sturdy and never complaining.  Later, my freshman year in college, I won Riccar in a cabinet at a drawing at the Ohio State Fair, thanks to my step-sister, who had entered me in the drawing.  I used that for years, then replaced it with a brand-new Kenmore in 1978.  She sewed beautifully, made more children's clothes and doll clothes than I can remember (and sewed over pins!).  When I embarked on my quilting journey, I decided that I wanted a "better" machine.  I now sew on a Brother NX 650 Q, which is fine.  But it doesn't have the horsepower of the Kenmore and doesn't like bulky seams at all.  I do wish I'd kept my Kenmore, more that's water under the bridge.  And now, a chance to rewind...

My wonderful quilting friend, Deb, offered me this gorgeous old machine, as long as I was willing to take care of it.  Well, yes!  How could I resist?  A friend of hers had found it, but wasn't able to keep it, so gave it to her.  I'm sure she'd like to have it still, but she needed space and gave it to me.

The cabinet is in fairly good shape and has a heavy glass plate on top.


Sadly, the wood top had some scratches, but that's what happens to all of us over the years.


The front of the cabinet has a nice size shelf to hold important machine supplies.


Inside the cabinet door was a small bag filled with bobbins (some filled), presser feet, and other attachments.  Clearly, someone had been using it.


Deb and I both think that this was originally a treadle machine.  At some point it was converted, with a foot pedal installed sideways to act as a knee controller.  The wiring doesn't look too bad, but no telling how old it is.  Much of it is cloth-wrapped.  My plan is to have my husband take a look, and if she doesn't look like a total fire hazard, I'll plug her in and see if she works.


She's a Singer, with a motor manufactured by Delco/General Motors in Rochester, NY in 1906 or 1907.  She's so pretty, with elegant multi-colored decals.  Some are worn away, but others just glow.


Aren't they gorgeous?!


Next stop will be the local sew-and-vac, to have her cleaned up and have the wiring re-checked and replaced as necessary.  I'd love to return her to a treadle, but that's beyond my ability.  I'll have to see what it would take and how much it would cost.

Meanwhile, she remains an object of affection rather than use.  And she's had to stay all closed up in the cabinet while four of my grandchildren are in town.  Maybe a good rainy fall day project?


Thursday, June 15, 2017

New beginning, old quilts!

A couple of weeks ago we were in Memphis for our grandson's graduation from 5th grade.  We are so proud of him, accepted to a STEM (science, technology, engineering and math) middle school for next year, and he's really looking forward to it.

After the ceremony, at a beautiful church with an amazing pipe organ, many of the kids and their families headed over to Central BBQ downtown.  I love this place -- they have three restaurants in Memphis, one just a block from my daughter's house -- so we were pumped to go there.  We heard that they have been bought out by Holiday Inn (which started in Memphis).  I so hope that it won't get "chained out."  It is just a fabulous place to eat.  If you get to Memphis, do head for Central.  There are more famous spots, but don't overlook this great place!

We ate in a big room for a large crowd.  While waiting in a loooong line to chow down, I noticed that the curtains in the room were old quilts.  Authentic, and most interesting.

This first one wasn't a creative masterpiece, but very nicely stitched.  In spots just out of the photo, you could see that some of the fabric had worn through.  I hope that there was some sun protection on the back.


At the next window was a hexie quilt.  Grandmother's Flower Garden?  Hard to tell.  It was really just a top with some kind of backing.  It doesn't look like it had actually been quilted.


I'm not sure about this next one.  The fabrics look old, but it was hard to open out the curtain to get a good view of the quilt itself.  The windows were very tall, and the bottom of the curtains/quilts came down only to my chin.  I had to enlist some other people in line to help hold them open, but this one wasn't a great photo success.  Still, it looks like something that was very utilitarian -- totally scraps.  I wish I knew more about its history.


Here was a wonderful Dresden plate quilt, probably made in the 1930s (?).  Again, all scraps, so that few elements were the same.


Finally, this beauty.  Not only were the colors and construction lovely, but the sun was shining through it at a perfect angle.  It was too difficult to peek at the back to look at the construction, but it certainly was the highlight of the window quilts.


I've been working on a couple of UFOs, and finally finished a set of Roman blinds for my daughter.  More on those projects next time!

Thursday, May 25, 2017

Little Projects

So, there's been a lot of sewing going on (finally!), but not much exciting to post.

I've continued working on the Otsego quilts, more or less as leaders and enders.  I ran out of every fabric except  the main ones for the block center squares.  Fortunately I was able to find more of almost everything.  But I did have to resort to similar fabrics for the last few blocks.  Anyway, you've seen enough of those, I suspect.  I'll post on that project when it's time to put the blocks together.

Meanwhile, no big finishes, but there have been some small ones.  The May miniquilt started out as lilacs.  Everything was coming into bloom, and it seemed an appropriate choice.  I didn't have any fabrics that actually looked like lilacs, but I pulled some purples.  No patterns, either, so I threw the purples into a basket (could have been pansies or grape hyacynths, whatever).  The flower area had a square in the center.  I broke that up into HSTs to give it more variety.  I'm not thrilled with the end product, but it's OK, I guess.  I haven't actually quilted it yet.  It's small, and I may replace it for next year.


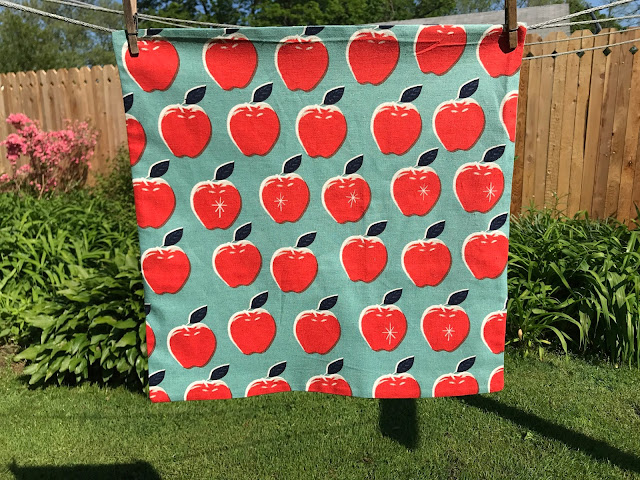
Next up, pillow covers for my daughter.  She picked the fabrics.  The apple one frayed like crazy, but it is pretty.  The pattern is super-easy, one that is all over the web, with subtle variations.  Basically, you have a front, then two pieces for the back, put them together with a zipper, sew it all together.  Voila!


There are also Roman blinds under the presser foot, also for my daughter.   More on those when they are ready to hang.

Meanwhile, I am looking forward to starting an entirely new quilting project -- no UFO, no home decor.  I have a Kaffe Fassett jelly roll calling my name!


Wednesday, April 12, 2017

Amish Quilts in Delaware


This past weekend we visited friends in Milford, Delaware.  My friend, Diane, has a friend, Nancy, a quilter who is so creative and somehow does loads of sewing in between babysitting for her grand-dog.  So on Saturday we all drove to a little Amish quilt shop, Shady Lane Selections, in Dover.  It is small, but packed with wonderful things -- not just quilty stuff, but wonderful kitchen things and just fun stuff.  I am not a recreational shopper, but this place was amazing.

The shop is lit by lots of windows and skylights and has gas lights as well.  The only concession to operating in an English (non-Amish) area is that there is electricity for a credit-card reader.  The floor space is half quilt-related.  This countertop was full of fat quarters, and when I turned around, there were just as many behind me.  The selection was beautiful.  


There were rows and rows of lovely fabrics -- you get just a glimpse of a few of them on the right side of this photo.  There were racks of gorgeous Amish quilts, all hand-made, of course.  I was a little surprised not to see any of what I think of as traditional Amish, black background with solids in bright, bold colors.  Most were fairly traditional patterns, exquisitely made.


This log cabin quilt just popped, all scrappy with such a variety of colors and prints.


This little embroidered panel was, I think, from a previous Row-by-Row.  


On the non-quilting side of the store were wonderful children's toys, some commercial (Melissa and David puzzles) and many handmade.  The doll clothes were lovely.


Some items weren't exactly Amish, but most of the clientele are "English."


 I loved the handmade signs by a local woodworker.  My favorite was the 4th one down, "Life is not about waiting for the storm to pass.  it's about learning to dance in the rain."


Back home again, with recent projects completed, I've been trying to make progress on the twin-bed Otsego quilts.  Lots done, the end is (sort of) in sight.  But I can only take so much -- time to branch out to something new.  

Speaking of something new, I'm headed out to the Left Coast in a couple of days to spend a week with my new granddaughter, June.  No sewing will be done, but my heart will be is full.


Wednesday, March 22, 2017

National Quilting Day


March is National Crafting Month and the 18th was National (and Worldwide) Quilting Day.  


And where was A Quilter's Path?

This month quilters get to celebrate with knitters and crocheters and other needleworkers, not to mention rug-hookers and stampers and jewelry-makers and scrapbookers.  As you can tell, I fall firmly in the needlework category.


Sadly, though, very little sewing has been happening.  As it turns out, this month is also when the hubster and I headed down to Florida and Tennessee to visit family.  The morning after we returned, our new refrigerator was delivered.  We spent a fair chunk of the day removing packing materials and moving food around. Today and tomorrow we are having central air installed -- my entire stash had to be removed from the closet, and my sewing room is temporarily unusable.

So, all good things, but no quilting so far.  But I did manage to finish up a few projects before I headed south.


Welcome, Leo!

My niece's second baby, Leo, was born in January.  His quilt was all done except for the quilting before he was born -- a new record!  It's the same disappearing nine-patch that I made for his cousin, JJ, just in different fabrics.  Aren't these little guys cute?


I took it to my local quilting group at Riverhead Vac and Sew, my new LQS, to help me choose a border fabric.  Never would I have thought of yellow, but these wonderful ladies picked this one, and I just love it!  It has red, orange and blue flowers that pick up the main colors in the quilt.


I used a simple cross-hatch to quilt the main part, but I decided to try a free-motion vine motif in the border.  To say that there were imperfections would be putting it mildly, but it was [mostly] pretty nice.  And finished not a moment too soon!


My Funny Valentine


My mini-quilt for February was (surprise!) a Valentine.  Actually, it was to be four small Valentine blocks going in four directions, but in the end, only one block turned out well enough to submit to public scrutiny.

I had a jar full of narrow (1"-1-1/4") red and pink strips that I hadn't used in my failed attempt at teeny-weeny four-patches.


I wanted to string-piece them and then sub-cut to make the patches for the heart blocks.  Bonnie Hunter suggests using pages from an old phone book to stabilize the strips.  Phone books are hard to come by these days, but I had last year's copy of one of those local Yellow Pages books that they drop on the end of your driveway.


I sewed the strips to the pages until I had enough to make the patches.
Mistake #1:  I should have sewed the strips on straight and then cut on the diagonal.  Sewing on the diagonal required longer strips.  No biggie, but annoying.


Mistake #2:  I pressed as I went along, after sewing on each strip.  With the paper still attached, the seams of course had to be pressed to one side.  With such tiny strips, the units ended up being almost entirely three layers thick.  This was bad enough for the square units, even worse when making the HSTs.  The thickness made it difficult to get nice points when sewing the units together.  That's why three of the four blocks ended up in the doggie bed.  Yes, you could see the missing points from the Brooklyn Bridge!

Mistake #3:  Nah, never mind.  I won't go into sewing units wrong sides together.  You understand.

Still, the remaining block looked festive and got its moment on the quilt hanger before March rolled in.


March Hints of Spring


Several warm periods during the winter had the crocuses and daffodils peeking through by late February.  I didn't want to think about March winds, and St. Patrick's Day is, after all, only one day.  So this month's mini-quilt is a daffodil.  I love the border fabric!  Only the flower is quilted, with straight lines creating the look of the ruffled trumpet.


And check this out.  The AC guys had to move the table with the quilt stand.  They backed it up to a south-facing window.  The shadows from the seams make it look like a stained-glass quilt, if you can ignore the lines from the window behind it.  Lovely.


See you soon!  Happy Spring!