I just can't get to my quilting until I clean up my work space -- what a disaster! Since my sewing room is also my study, it's piled with papers that need to be sorted and filed, 3 years worth of dog-eared Gourmet, Bon Appetit, Cooking Light and Fine Cooking magazines, a pile of Planning Board agendas and books that I saved to use in my non-existent consulting career. So I have some serious re-organization work to do.
Meanwhile, I thought I'd share two really neat quilting techniques that appeared in my mailbox over the last couple of days. Neither one is new -- you can certainly find them if you poke around on the web. But they are so interesting! Enjoy!
Tube Quilting
In this video you see how to sew strips of fabric into a tube, then slice them up into triangles to make several kinds of interesting patches. So easy!
No Sewing Until You Quilt It
I've never seen anything quite like this. It's a method for joining pieces of fabric in any shapes you want using a fusible interfacing called French Fuse, which you can find on a number of quilt-related websites. The technique was developed by Ann Holmes. It's kind of like landscape quilting, except that you don't have to cut little squares and triangles -- just go free-form to get the effects you want. My next project (AFTER I quilt Q-911 and the baby quilt) is going to be a quilt that copies a photograph, not really a landscape, but using the same techniques. But now I'm really curious about this method -- I even ordered the DVD today.
You also might want to check out the page on Leah Day's website where she posted this video to see more about the goddess art quilts that she has been making for several years.
Monday, January 30, 2012
Friday, January 27, 2012
A Charming Baby Quilt (Part 2)
The border is done, the batting and backing basted, and I'm all ready to quilt the new baby quilt. That was fast!
Designing the border
I decided to buy more of the solid colors that came with the charm packs, since the quilt is so busy, and to make a striped border with a 9-patch in each corner. My new software, Quilt-Pro for Mac, was helpful. Because my sewing still isn't all that accurate, the quilt top was a little undersized after I squared it up. But I just plugged the measurements into the program and then made small adjustments in the border width until I had a border that allowed me to cut nice, handy 2" strips (less likely to accidentally cut on the wrong line).
Sewing the border
Since I talked about chain-stitching in the last post, I figured I'd take the opportunity to get some pictures of the process while I pieced the border:
 The nine-patches are almost done. Rather than making a 9-patch block for each corner, I sewed the squares to the shorter strips, then just sewed the strips together to make a single wide strip for the horizontal borders. Voila!
 I pressed the seams in each individual strip in one direction, alternating between strips. This allowed the seams to nest nicely when I sewed the strips together.
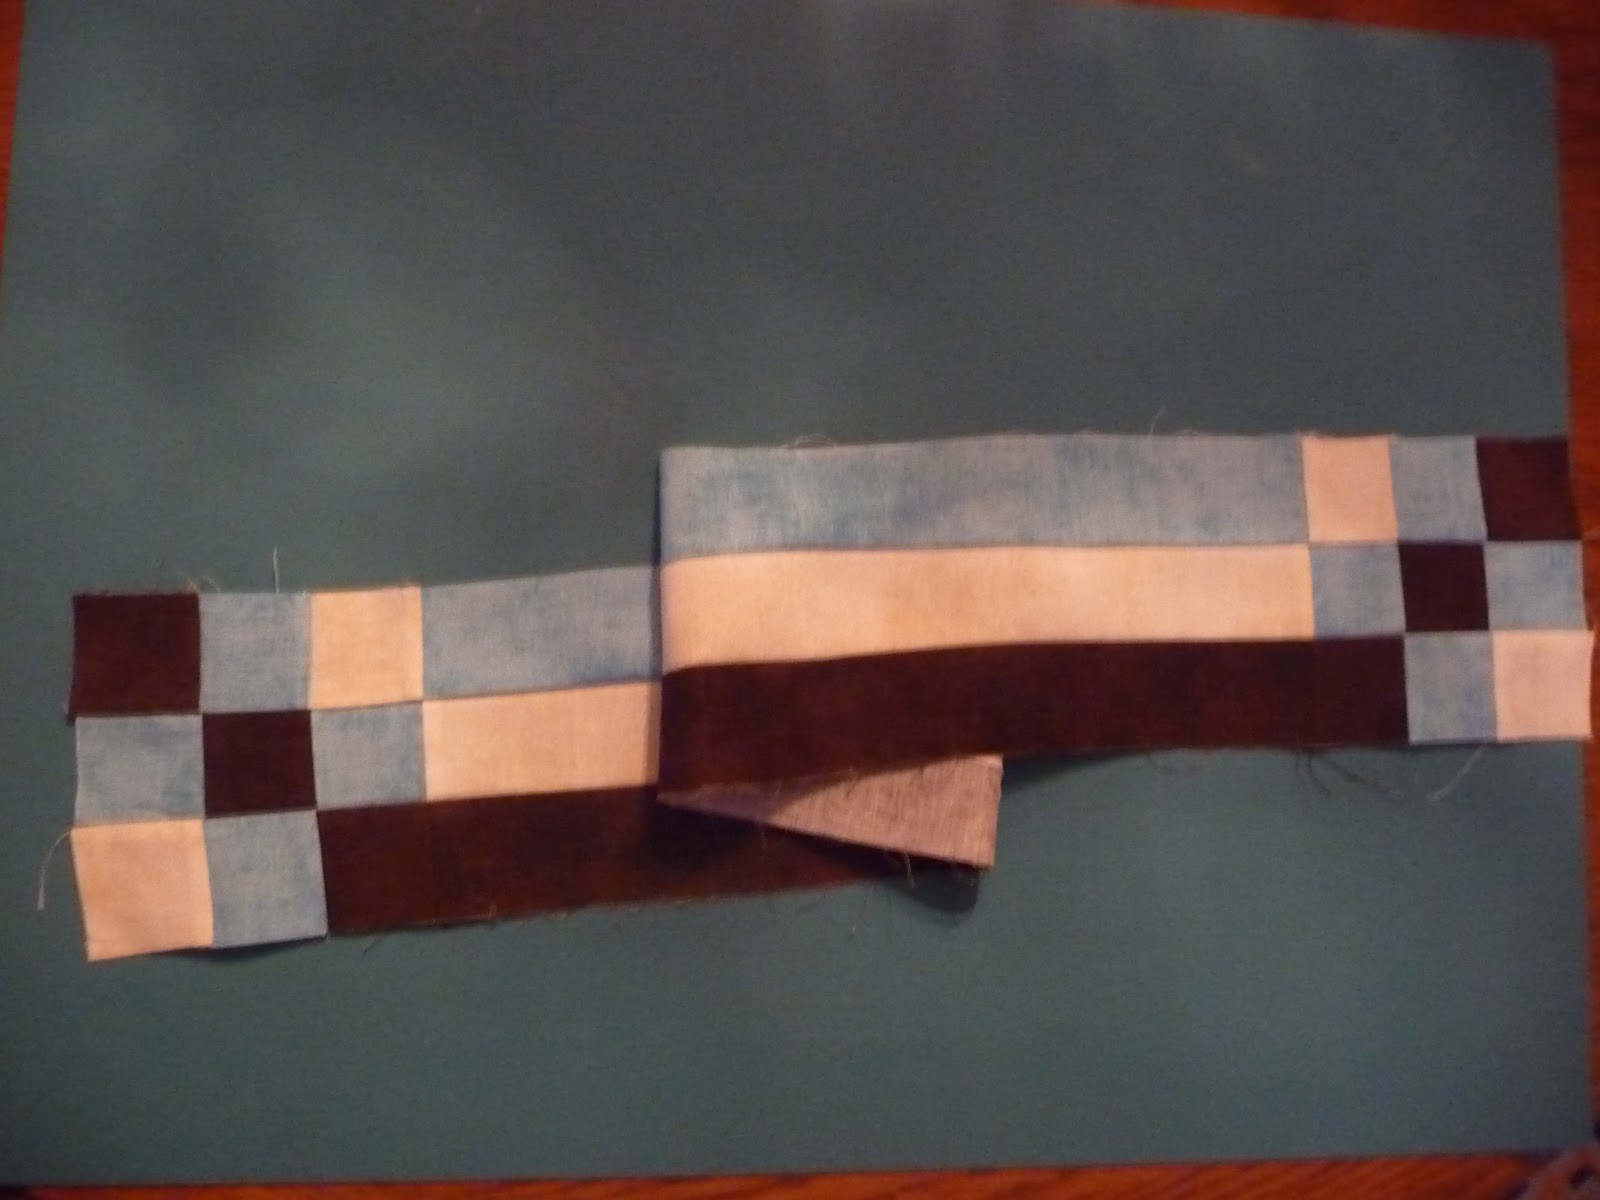
 I put the brown as the inside border strip to frame the rest of the quilt. Using Quilt-Pro, I tried it out in the middle and outer locations, but I liked the inside better. And I swapped out the locations of some of the squares in the nine-patch so that the brown squares would step down evenly.
See how nicely the seams come together? This is the best quilting trick I've learned.


The binding is all pieced, too. Now for the quilting, which readers of this blog know is my Achilles heel. Wish me luck!
Designing the border
I decided to buy more of the solid colors that came with the charm packs, since the quilt is so busy, and to make a striped border with a 9-patch in each corner. My new software, Quilt-Pro for Mac, was helpful. Because my sewing still isn't all that accurate, the quilt top was a little undersized after I squared it up. But I just plugged the measurements into the program and then made small adjustments in the border width until I had a border that allowed me to cut nice, handy 2" strips (less likely to accidentally cut on the wrong line).
Sewing the border
Since I talked about chain-stitching in the last post, I figured I'd take the opportunity to get some pictures of the process while I pieced the border:
 |
| Note the slight space as I move from one strip to the next. |
 |
| You can just barely see the chains of stitches connecting the strips. |


 |
| I added the side borders first. |
 |
The horizontal borders with the 9-patch cornerstones.
|
 I put the brown as the inside border strip to frame the rest of the quilt. Using Quilt-Pro, I tried it out in the middle and outer locations, but I liked the inside better. And I swapped out the locations of some of the squares in the nine-patch so that the brown squares would step down evenly.
See how nicely the seams come together? This is the best quilting trick I've learned.


The binding is all pieced, too. Now for the quilting, which readers of this blog know is my Achilles heel. Wish me luck!
Tuesday, January 24, 2012
A Charming Baby Quilt (Part 1)
It was a small pack -- only 21 5" squares -- so I was fishing around for how to use them. Then I ran across this fun and easy idea on a website called Nancy's Fabrics. Nancy's directions are much less complicated than mine, but she's really talking about how to use the fabric and doesn't get into the details of sewing.
Make the 9-patches
 |
| I didn't use the solids on the right |
2. Start sewing! I chain-sewed the patches, but I only used the fabric from one package at a time, so I wouldn't get lost.
 |
| The first two columns are sewn. |
. |
| Squares from one pack stitched together. |
3. I am a great believer in pressing. Lots of quilters just finger-press along the way, but I find that pressing with an iron really helps make the sewing more accurate -- more on this later -- and you can spot anything that needs fixing before it become impossible to correct! Press the seams in the first row of your patch to one side. Press the seams in the next row to the other side. Press the last row the same as the first. OR press the seams in the first row toward the middle, the second row to the outside, and the last row same as the first. Your goal is to have the seams going in opposite directions for when you sew the rows together. This sounds complicated, but really, it's not! And it's worth the extra effort.
 |
| Seams pressed in opposite directions. |
 |
| One 9-patch sewn. |
Make and sew your blocks
1. After you've made your 9-patch squares, get out your mat and rotary cutter and cut each patch into quarters. As you can see, each smaller block has one full-size (5") square, one quarter-square, and two rectangles. I got two 3-patches out of each package of fabric, so I ended up with 24 blocks.
 |
| 9-patch cut into four blocks |
2.. Now, after squaring up your blocks, re-arrange them to create your quilt. The directions on Nancy's website suggest several possible arrangements, but I decided to go with just a plain 2:3 rectangle with no sashing between the blocks. I started playing around with the blocks, sticking with my two original criteria (no adjoining patterns or colorways).
I was pretty happy with the way most of the seams in the patches matched up, and I knew that with all the different patterns rolling around the quilt top, the final seams probably wouldn't be all that noticeable. But I still wanted them to match as well as possible. Then it hit me! I added another requirement to my layout: no seam matching between blocks!
 |
| No seam-matching required! |
3. Sew your blocks together using the same chain-sewing technique that you used to make your 3-patches. When you sew your long seams (columns), you won't have to match a single seam. And when you sew your rows, you only have to match the 3 vertical seams that you just sewed. And of course, you remembered to press them first, in opposite directions, so your seams will be lovely.
 |
| Pre-cut, but not pre-accurate. |
Also, beware mixing pre-cuts from different manufacturers. These were all the same, but the sizes of the squares may differ, even just a little, between manufacturers. That's OK, as long as you know it and account for the differences.
That's it for today. Time to get the border fabrics cut and sewn. I'll be back with Part 2 in a few days.
Monday, January 23, 2012
Free-Motion Tools
Yesterday I said that I'd provide some details on some free-motion tools that I've been using. So here we go. All three can be purchased as a set through Leah Day's website, but they are also available in quilt stores and on other websites as well. Just head out to your favorite shop or type them into your search engine and get what you need. Bear in mind that my difficult previous experience could have been a lot worse without these.
Machingers
These gloves are worth every penny. They let you easily move your quilt around without pressure on the fabric to move it. I find the movements more fluid and even with this tool. To be honest, I lost my original Machingers at a class and got a substitute at Jo-Ann Fabrics. The substitute works fine, but maybe like Dumbo's feather, I like the Machingers the best. Of the three tools, I find these the most indispensable.
Supreme Slider
My machine came with an extension table that gives me a reasonably large surface when I'm quilting. But the Supreme Slider does add ease of movement. As a novice quilter, I can't testify about how much better the quilting flow is with this tool, but it does seem to be better than without it. The basic one covers most of my sewing surface area; there is a larger size, too.
Magic Genie Bobbin Washers
I don't honestly know how much help these are. I've read that a vertical, rather than horizontal, thread spool provides the most even thread feed. My machine has a horizontal spool. And I did get that awful thread next the other day (gak!). But these are inexpensive, and many experienced quilters recommend them. As a new quilter, I still have lot of ancient spools of thread (some are still wood spools!). So if these washers will help to make old thread usable, I'm in.
Sunday, January 22, 2012
Call Q-911!
Quilt emergency!
After days of practice, I decided that Friday was the day to finally try my free-motion "skills" (?!) by stippling on a real quilt. What a disaster! Everything I've come across (web, books, videos, classes) says to practice like crazy on a small (12" - 24") faux quilt sandwich. But that didn't prepare me for how the weight of a quilt, albeit a small (lap-size) one, would resist moving. Even with my Magic Genie bobbin washer, Supreme Slider and Machingers,* I ended up with tiny stitches and total lack of control over where my stitching was going. I am so NOT going to show a photo of this!
The attempt ended when I a got a huge knot of bobbin thread on the bottom of the quilt. I was in the process of deciding that I could live with the imperfect stitching until this happened. The back is pieced, mostly a light-colored fabric, and I was quilting with light thread, but of course the thread mess happened right in the middle of a dark strip on the back. No choice but to get out the ripper.
 I was so upset about this that I dreamed about it that night. But at least my subconscious brain figured out what I'd done wrong. I plan to incorporate some cursive text in the stitching on the horizontal sashes. So I started stippling on the vertical sashes to avoid tackling the text for the time being, and failed to begin in the middle of the quilt (where the text would be). I knew better -- everyone says to start in the middle. But I guess my enthusiasm overpowered my common sense. So, my [very] bad on that. Never again! Measure twice, cut once. Think twice, stitch once!
All the free-motion how-to's say to start with quilting using light thread on light fabric (all the better to not see it). The trouble is, I couldn't see what I was doing or where I'd been. Even where I tried drawing on the fabric, I just couldn't figure it out. I'm thinking that maybe part of the problem is my free-motion foot. It's wide and plastic, not like the small metal circles on many machines. But whatever, it's what I have, so what to do?
Taking it to heart
The stippling I think I can now handle. Not great, but acceptable. I plan to transfer the text or guidelines to the sashing in some way. The intersections are a bit of a challenge, though. I've decided to put a heart where the stippling in the vertical sashing meets the text in the horizontal sashing. The heart shape is wonderful for neatly ending a line of stitching that's not on an edge, since it has two closing points (top center and bottom point). It's also perfect for incorporating changes in direction (like the sashing intersection). And they are easy for the beginning quilter -- you don't have to retrace any lines.
These two photos (sorry they're so dark) illustrate the many ways that hearts can connect with other curvy lines. They are from 501 Quilting Motifs (from the editors of Quiltmaker magazine, Martingale & Company, 2011).
I marked hearts on a practice square, but I couldn't see what I was doing. The "hearts" ended up as some really weird, skewed shapes. What I've figured out is to define a square where the heart will go (such as the sashing intersections), mark the vertical point where the heart will center (about 1/3 of the way down the square) and the vertical point where the curve of the heart changes (about halfway down). Then free-motion away.

I tried all this on the other vertical sash, and it seems OK. You may be able barely to see the original basting in this photo. If I could have left it in, there wouldn't be all that marking to do. But of course, quilting over the basting stitches wouldn't be too bright.
Unfortunately, since the stippling was more open (a.k.a. successful) on the second try, I had to go back and rip out everything else that I did on Friday. Just as well, but some of the stitches are so tiny, I had to use a needle (not a ripper or even a pin) to get them out. Several hours' work, but quite an impressive learning experience! I promise I'll post the finished product. Really, I will!
* I show you these in my next post.
After days of practice, I decided that Friday was the day to finally try my free-motion "skills" (?!) by stippling on a real quilt. What a disaster! Everything I've come across (web, books, videos, classes) says to practice like crazy on a small (12" - 24") faux quilt sandwich. But that didn't prepare me for how the weight of a quilt, albeit a small (lap-size) one, would resist moving. Even with my Magic Genie bobbin washer, Supreme Slider and Machingers,* I ended up with tiny stitches and total lack of control over where my stitching was going. I am so NOT going to show a photo of this!
 | ||
| Quilt back; knot was in the brown area |
I was so upset about this that I dreamed about it that night. But at least my subconscious brain figured out what I'd done wrong. I plan to incorporate some cursive text in the stitching on the horizontal sashes. So I started stippling on the vertical sashes to avoid tackling the text for the time being, and failed to begin in the middle of the quilt (where the text would be). I knew better -- everyone says to start in the middle. But I guess my enthusiasm overpowered my common sense. So, my [very] bad on that. Never again! Measure twice, cut once. Think twice, stitch once! | |
| My darning/free-motion foot |
Taking it to heart
The stippling I think I can now handle. Not great, but acceptable. I plan to transfer the text or guidelines to the sashing in some way. The intersections are a bit of a challenge, though. I've decided to put a heart where the stippling in the vertical sashing meets the text in the horizontal sashing. The heart shape is wonderful for neatly ending a line of stitching that's not on an edge, since it has two closing points (top center and bottom point). It's also perfect for incorporating changes in direction (like the sashing intersection). And they are easy for the beginning quilter -- you don't have to retrace any lines.
 |
| Heart Strings |
 | |||
| Hearts Around |
I marked hearts on a practice square, but I couldn't see what I was doing. The "hearts" ended up as some really weird, skewed shapes. What I've figured out is to define a square where the heart will go (such as the sashing intersections), mark the vertical point where the heart will center (about 1/3 of the way down the square) and the vertical point where the curve of the heart changes (about halfway down). Then free-motion away.

I tried all this on the other vertical sash, and it seems OK. You may be able barely to see the original basting in this photo. If I could have left it in, there wouldn't be all that marking to do. But of course, quilting over the basting stitches wouldn't be too bright.
Unfortunately, since the stippling was more open (a.k.a. successful) on the second try, I had to go back and rip out everything else that I did on Friday. Just as well, but some of the stitches are so tiny, I had to use a needle (not a ripper or even a pin) to get them out. Several hours' work, but quite an impressive learning experience! I promise I'll post the finished product. Really, I will!
* I show you these in my next post.
Wednesday, January 18, 2012
Fabric Shopping
Thanks to all the early adopters! So many nice comments from so many friends. You can now comment directly on the blog -- just click on the Comments link at the bottom of a post. For now, you have to join the blog to comment.
I didn't actually get to do any quilting today, but I did have a nice long lunch with my wonderful friend Peggy. Even though we started out as professional acquaintances, we've found a strong connection in quilting.
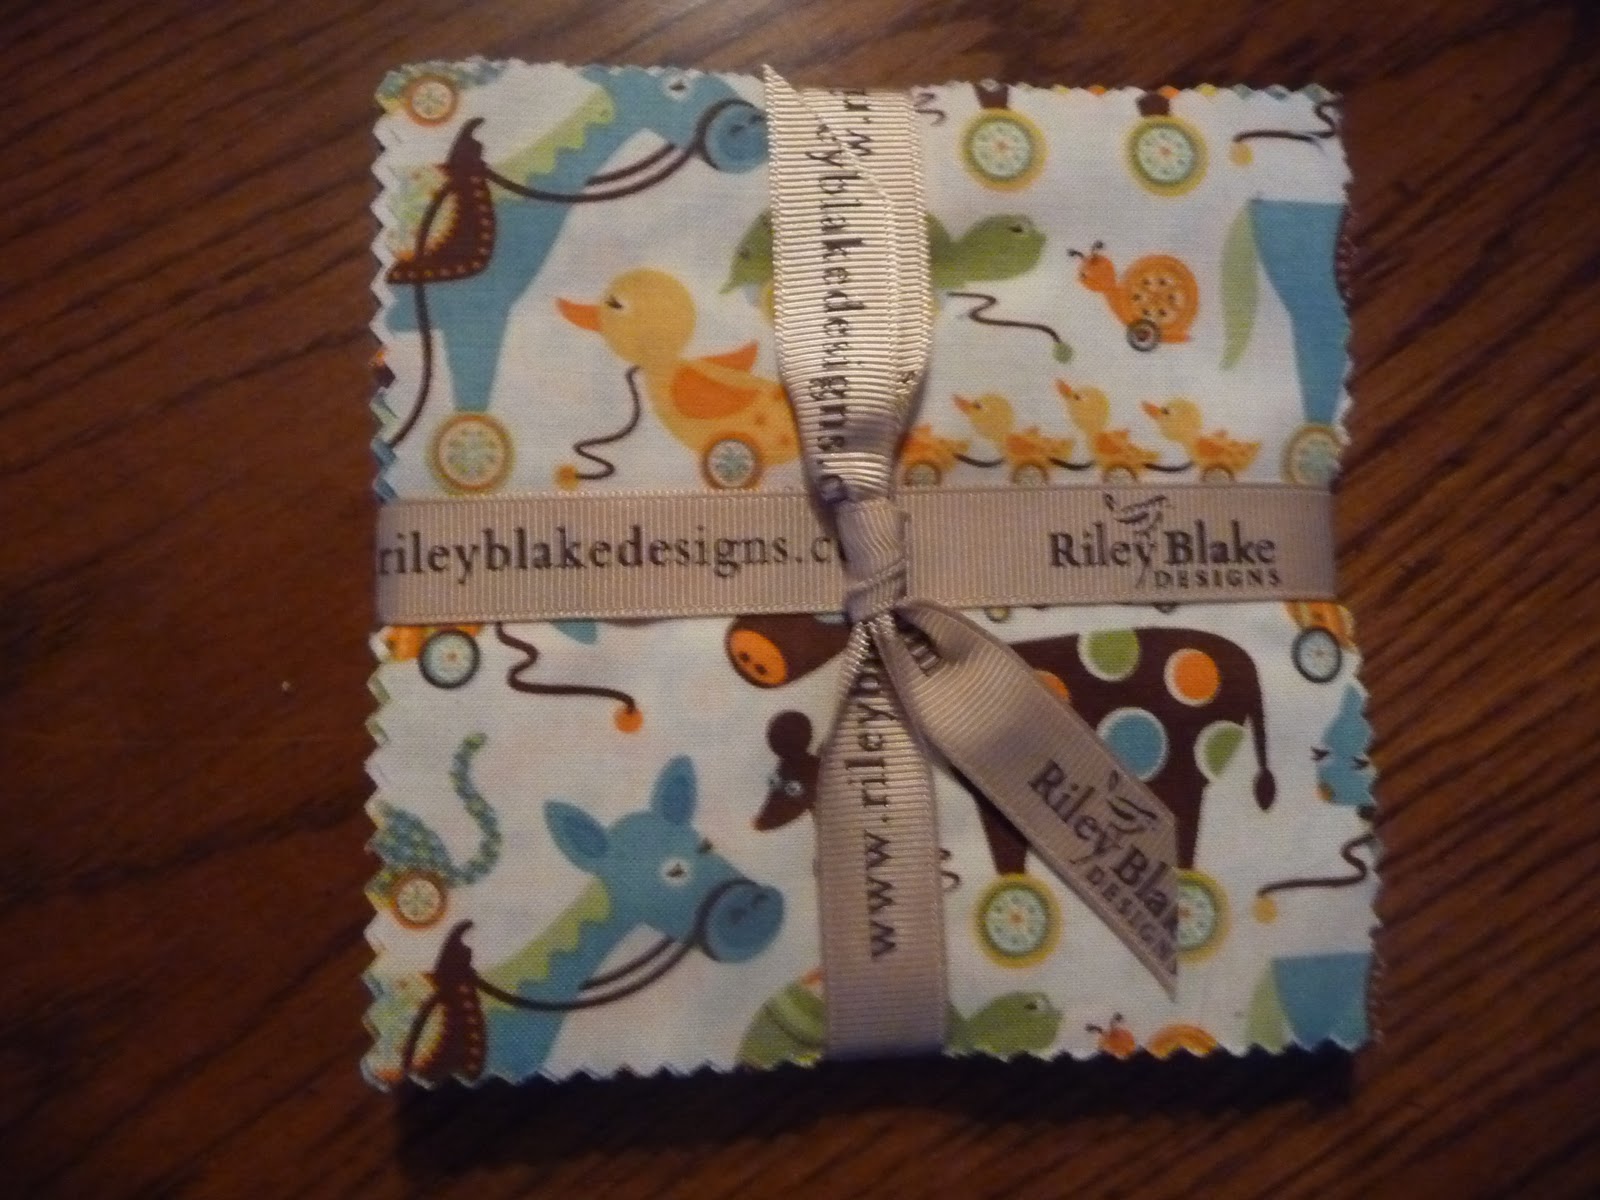
After lunch, I bought some fabric at a chain fabric store, but I was disappointed in the selection. I'm convinced that the local quilt shop or the web are the best bets to get quality fabric. One soon learns the best manufacturers and the kinds of fabrics, designs and colors that they specialize in. Right now I'm making a baby quilt based on Riley Blake Mod-Tod charm packs. They have really fun kids' fabrics. Still, not every small shop can carry every fabric, so sometimes I visit the web to get something that I just can't find locally, usually to match something I already have. In this case, no local stores carried what I wanted, so I ordered some Riley Blake Blendables to make the border for this quilt -- details to follow.

I do prefer the quilt shops. Mine are Pieceful Quilting in the winter and Delphine's Quilt Shop in the summer. As a geographer, I'm glad to suggest an iPad app called Quilt Shops. It shows you (and me!) all the nearby shops based on a zip code. Enjoy.
I didn't actually get to do any quilting today, but I did have a nice long lunch with my wonderful friend Peggy. Even though we started out as professional acquaintances, we've found a strong connection in quilting.
After lunch, I bought some fabric at a chain fabric store, but I was disappointed in the selection. I'm convinced that the local quilt shop or the web are the best bets to get quality fabric. One soon learns the best manufacturers and the kinds of fabrics, designs and colors that they specialize in. Right now I'm making a baby quilt based on Riley Blake Mod-Tod charm packs. They have really fun kids' fabrics. Still, not every small shop can carry every fabric, so sometimes I visit the web to get something that I just can't find locally, usually to match something I already have. In this case, no local stores carried what I wanted, so I ordered some Riley Blake Blendables to make the border for this quilt -- details to follow.
I do prefer the quilt shops. Mine are Pieceful Quilting in the winter and Delphine's Quilt Shop in the summer. As a geographer, I'm glad to suggest an iPad app called Quilt Shops. It shows you (and me!) all the nearby shops based on a zip code. Enjoy.
Tuesday, January 17, 2012
2012 is the year I learn to free-motion quilt
When I started quilting, I thought "quilting" meant sewing the pieces of fabric together. The intricacies of doing all that decorative stitching just didn't cross my mind! Then I started making my first quilt for my granddaughter. It was a wholecloth map of the United States. What a snap! Just make the quilt sandwich and stitch around the state boundaries -- voila! Well, Wyoming went pretty well, but as I worked my way out from the center, the rivers started to appear. Three broken needles on the Mississippi alone. And then there were the coasts. Ah, yes, another Lesson Learned.

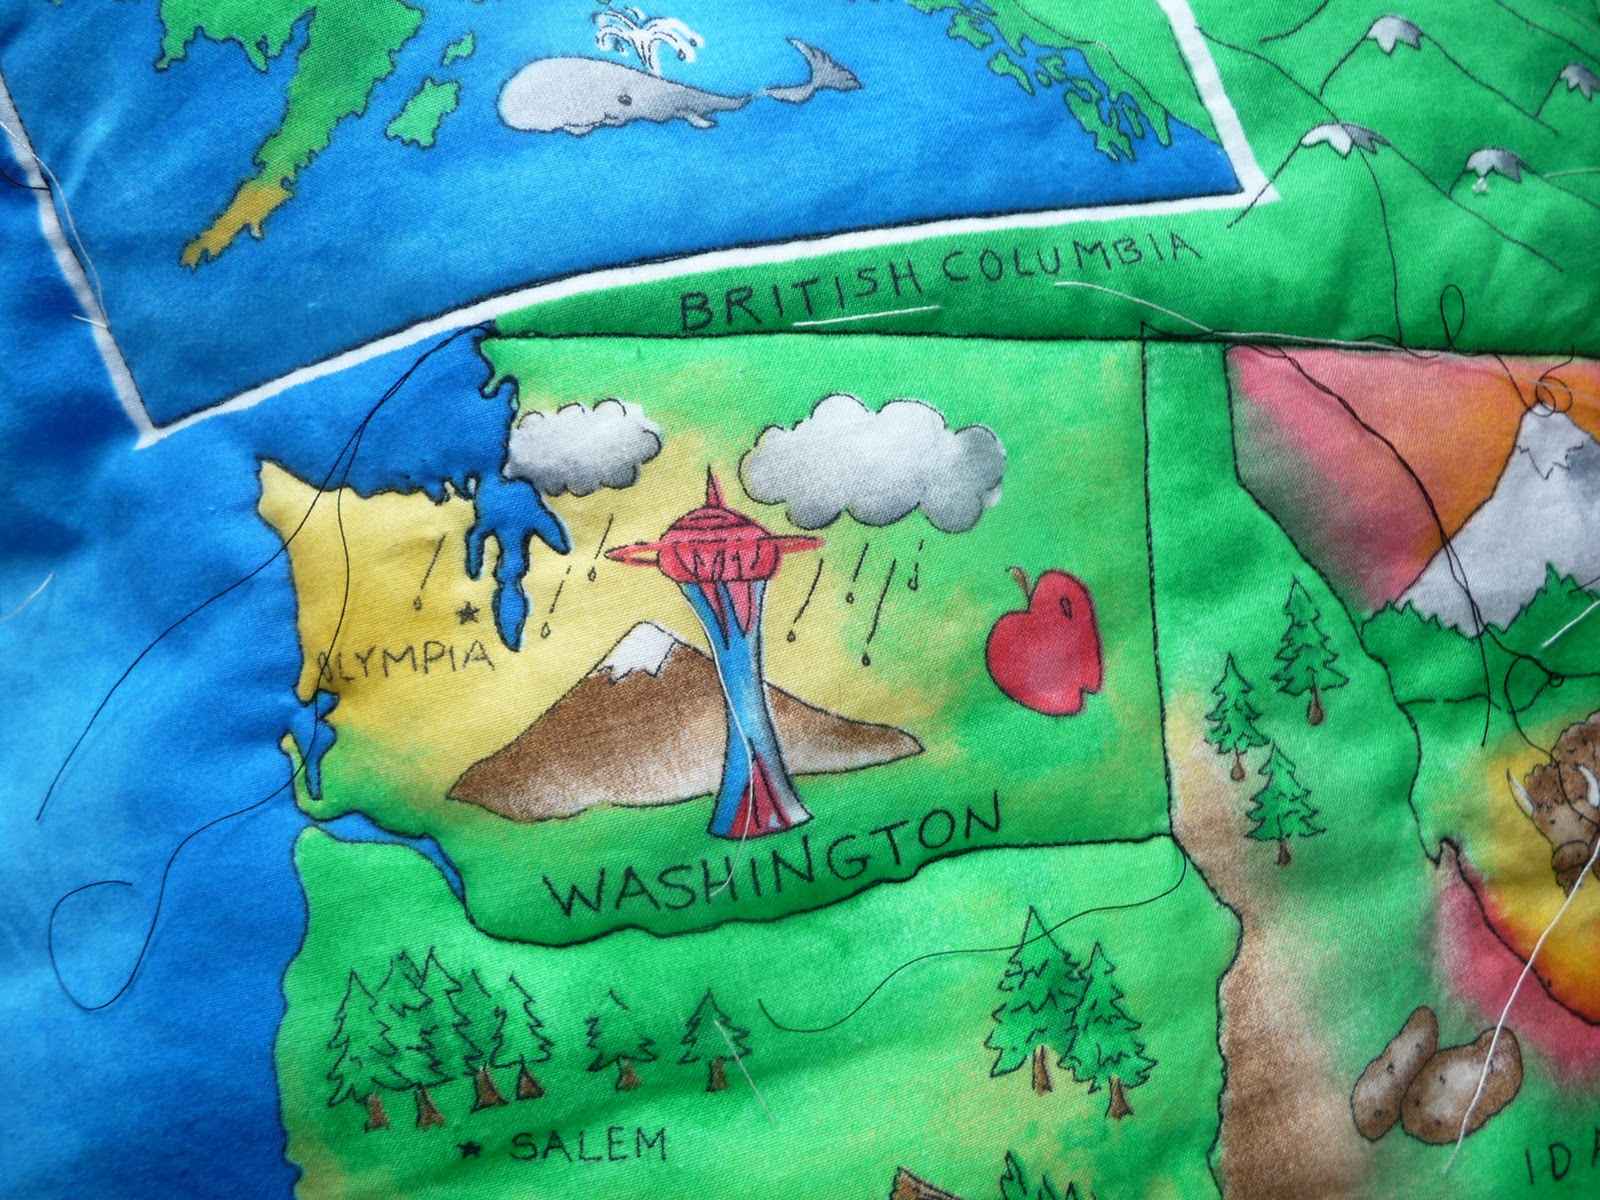 |
| I thought if I could do Puget Sound, I could do anything. I failed to notice the Aleutian Islands. And never mind Chesapeake Bay! |
I took a class a few months ago and bought a few books. I've watched a ton of videos on the web and have become a devoted follower of Leah Day's Free Motion Quilting Project. Now I have to practice, practice, practice. Today I worked on stippling leftover strips from the sashing on one of my current projects. This gave me a chance to work within the constrained width of the sashing -- not as fluid as working in a larger space.


I found that I was making the wiggles rather small, resulting in a stiffer quilt that I wanted. It will take some more time to get the size right and feel comfortable. I also wanted to try different colors of thread. The stippling was more even when I used the darker thread -- it was easier to see where I'd been as I moved the test piece around (note the loops and crossed stitching lines with the lighter thread). But I think I'll use the lighter thread on the actual quilt, to keep the stitch quality as invisible as possible!
Saturday, January 14, 2012
Getting Started
January is national Get Organized month, so I thought I'd start with my workspace. So, this is my "home." I transformed my former computer room into my sewing room and took advantage of as much existing furniture as possible, including a computer desk and a retired bookcase. I moved all my sewing and other needlework from a basement bedroom to this wonderful south-facing room. I love the sunlight, but... already lots of lessons-learned (LL) here.
 My machine is a Brother Innovis NX-650Q. I got it just as the model was being "upgraded" (renamed with a higher price). So far (after 1 year) it's been great, but (LL #1) I kind of wish I'd gotten a different brand. The only store that sells and supports Brother within an hour's drive is horrible. I had a very bad experience with them and will never set foot in the place again (unless the management changes). Still, it's a nice machine and came with practically everything I could possibly use, including a free-motion foot and a walking foot.
LL #2 - using my old computer desk isn't working out as well as I'd hoped. The keyboard tray is handy; just pull it out and I have an extra work surface for small tasks like basting or clipping strip-pieced units. There's an extra "table" that fits onto the machine, but there's still not enough space to manhandle a twin-sized quilt. And the surface is a little too high -- the height of the keyboard tray would be better. I've already put my husband on notice that it's time to get handy.

So far my modest fabric stash fits in the closet, but the storage system needs some serious tweaking. An excellent buy was the rack for storing spools and bobbins (aren't they pretty?). I got some stick-on LED lights for the closet, but they are useless -- too weak to illuminate the rack.

LL #3 - retirement is wonderful when you can spend hours doing something that you love in a sunny space.
Subscribe to:
Posts (Atom)